
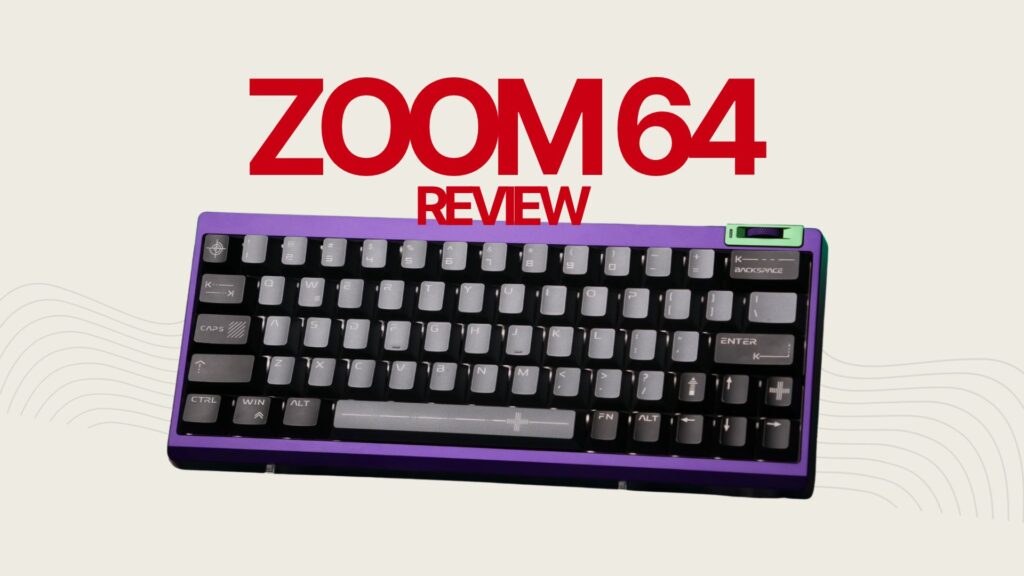
This isn’t a review of one product, it’s a review of a complete custom build: the Zoom64 case kit in Neon Violet, the Flux60 HE (Babao 60 HE) module, WS Flux Ocean Whisper switches, and MCAPS aluminum keycaps, all from Meletrix. I documented the full build process on video, you can watch the whole thing here, including a sound and typing test at the end. This article is the written companion, the specs, the pricing, and the honest impressions that don’t fit into a video.
- What’s in the Kit
- The Build Experience
- The Build Process, Step by Step
- Setting Up the Polaris Twin OS Driver
- What Makes This an Analog Gaming Keyboard
- Flux60 HE Module: The Technical Core
- The Polaris Twin OS Driver: Feature Overview
- WS Flux Ocean Whisper Switches
- MCAPS Aluminum Keycaps
- Weight and Build Quality
- Real-World Gaming Performance
- The Look
- How Much Does a Build Like This Cost?
- Where to Buy
- Verdict: 9/10
Quick verdict: 9/10. This is a genuinely impressive piece of hardware, heavy, solid, visually striking, and backed by hall effect performance that isn’t just marketing copy. The build process itself was seamless.
What’s in the Kit
| Component | Price | What it is |
|---|---|---|
| Zoom64 Case Kit (Neon Violet) | $134 | Gasket-mount 60% case, GH60 layout |
| Flux60 HE (Babao 60 HE) Module | $199 | Aluminum hall effect PCB, includes switches |
| WS Flux Ocean Whisper Switches | (included with module) | Hall effect magnetic switches |
| MCAPS Aluminum Keycaps | $79 | Die-cast + laser-etched Cherry profile aluminum |
| Total | $412 |
The Build Experience
If you’ve been intimidated by the idea of a “custom keyboard build,” this is a good example of how approachable a case-kit-plus-module build actually is compared to a from-scratch solder project. You’re assembling pre-engineered pieces rather than building electronics from raw components, and as someone building their first keyboard, the whole process was genuinely manageable. The full step-by-step is below, but if you’d rather watch it, the video covers the same process with a sound and typing test at the end.
The Build Process, Step by Step
This is a gasket-mount build, and it’s really a module swap: taking the Flux60 HE module and fitting it into the Zoom64 case, which needs one extra step most straightforward builds don’t require.
1. Unbox the Zoom64 case kit.
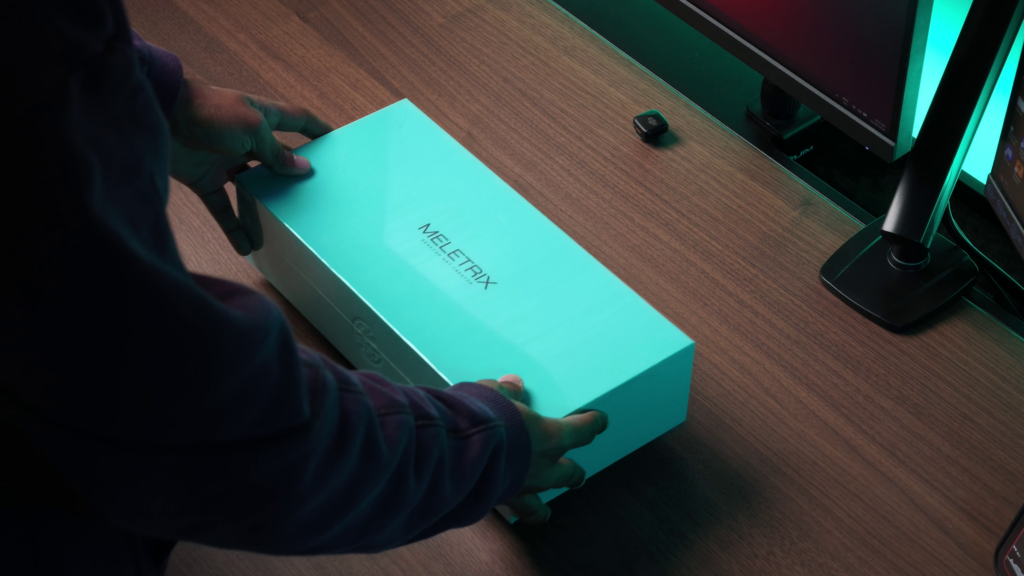
2. Unbox the Flux60 HE module.

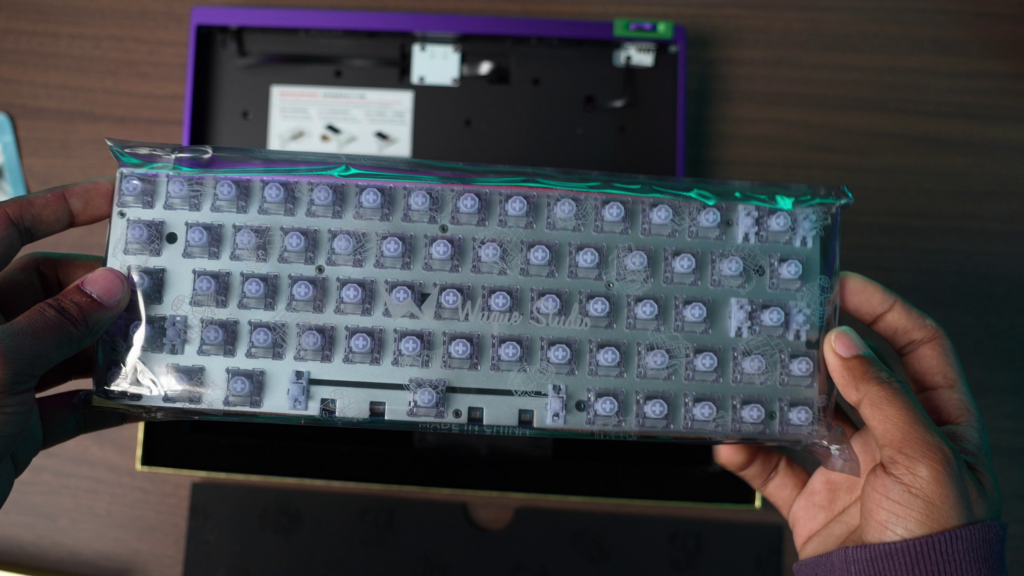
The module ships as its own assembled unit, switches already installed on its own plate.
3. Remove the switches from the module.
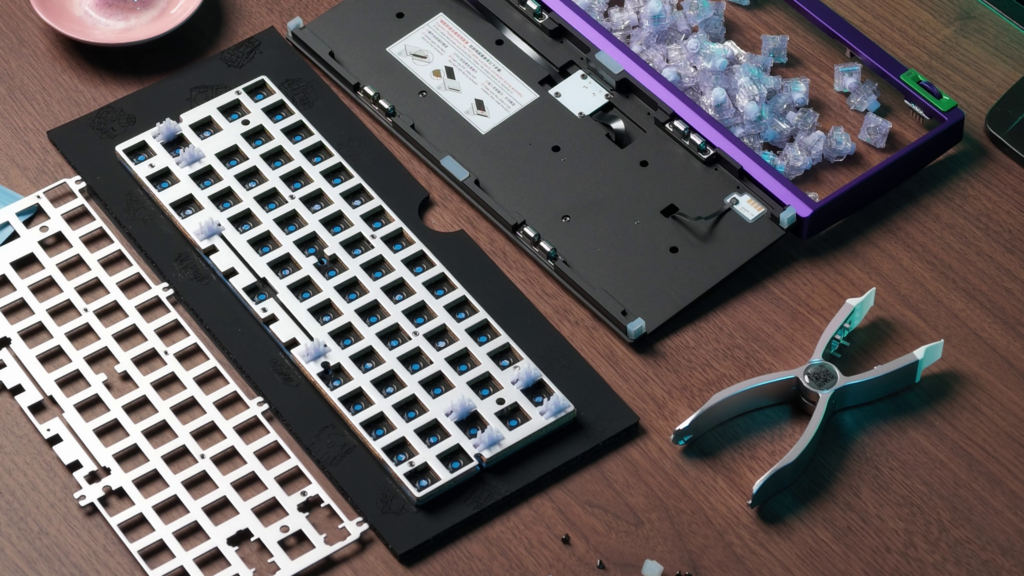
Since the module’s stock plate doesn’t fit the Zoom64 case, the switches need to come back out before the plate can be swapped.
4. Swap in the correct plate & Reinstall the switches and screw everything down.
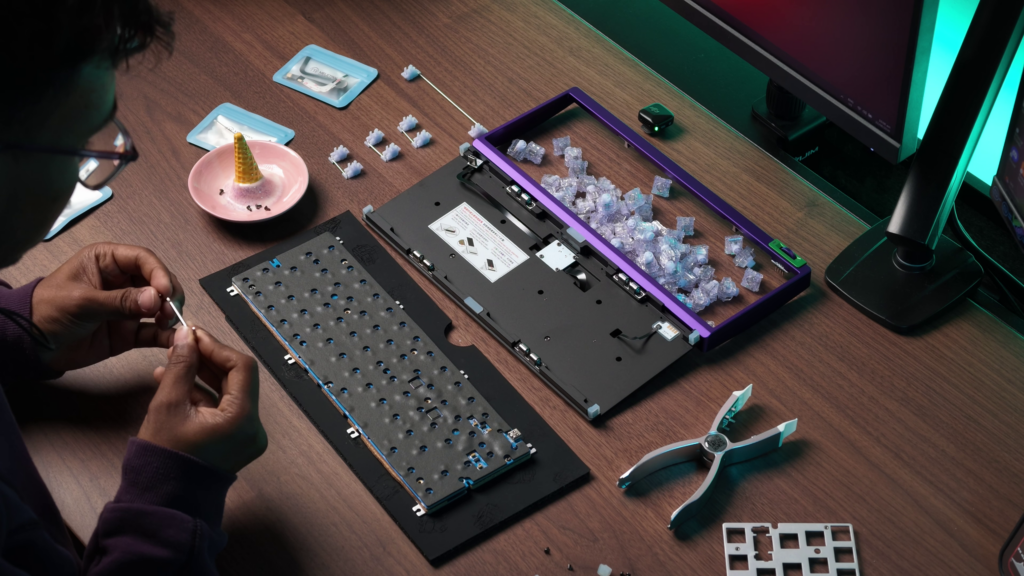
Fit the plate that actually matches the Zoom64 case dimensions. With the right plate in place, the switches go back in, and the assembly gets screwed together properly.
6. Apply the gaskets.
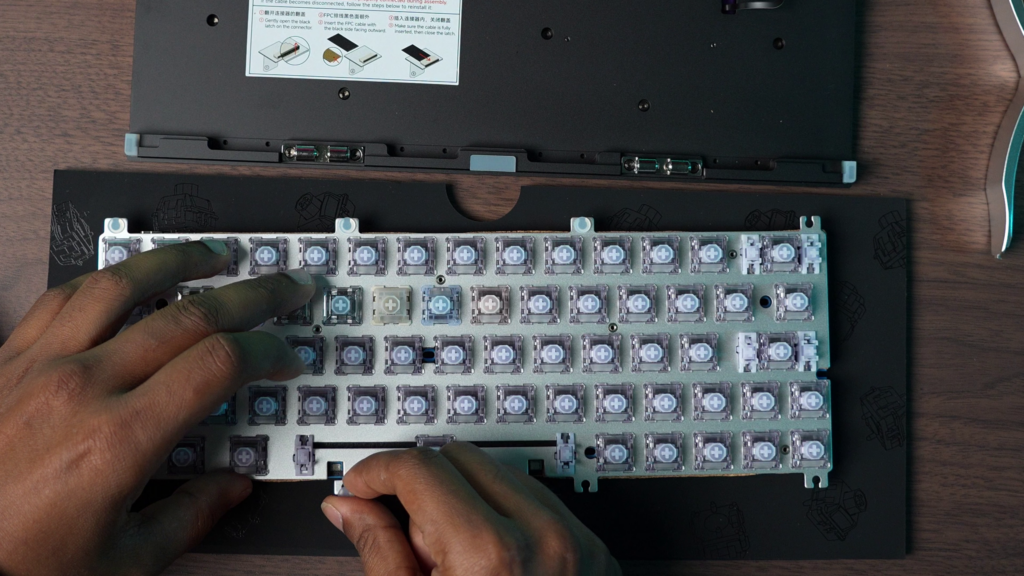
Small silicone gaskets stick onto designated tabs on the PCB, this is what actually creates the gasket-mount bounce and sound signature.
7. Connect the daughterboard.

This is the step worth a warning: there’s an internal ribbon cable connecting the USB-C daughterboard (fixed to the case) to the main PCB, and getting it properly seated took more than one attempt for me. Go slowly here.
8. Seat the assembly into the case.
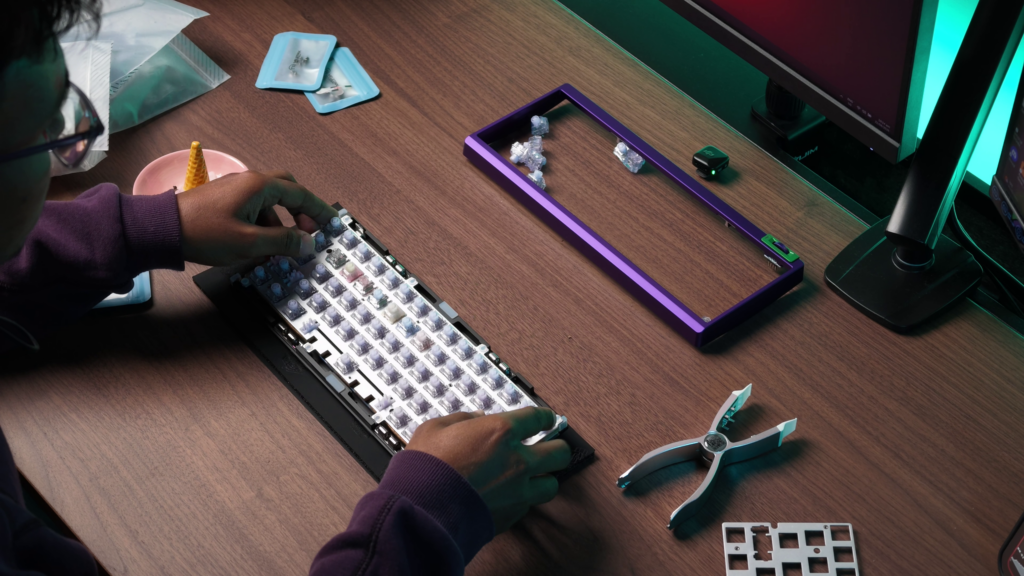
Lower the completed PCB/plate assembly into the bottom case, making sure the gaskets rest properly on the case’s internal ledges.
9. Re-attach the top frame.
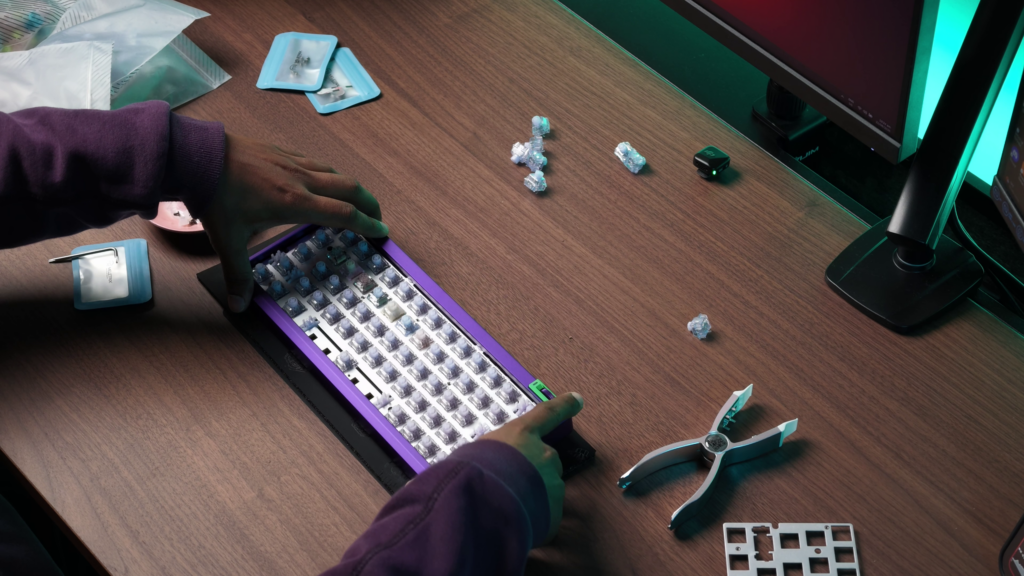
Snap it back onto the base to lock everything together.
10. Install the MCAPS keycaps.
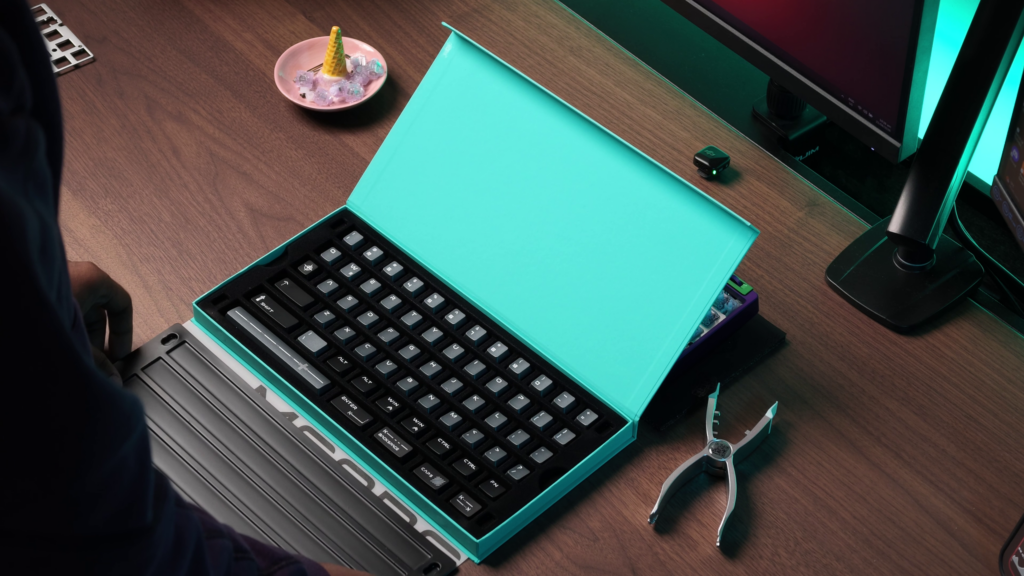
Push them onto the switch stems.
Total build time for me, as a first-time build, was about 2-3 hours. The plate swap and switch reinstall step is the one that adds real time compared to a straightforward drop-in module, budget extra patience there, along with the daughterboard connection, if you’ve built before, expect it to go faster overall.
Setting Up the Polaris Twin OS Driver
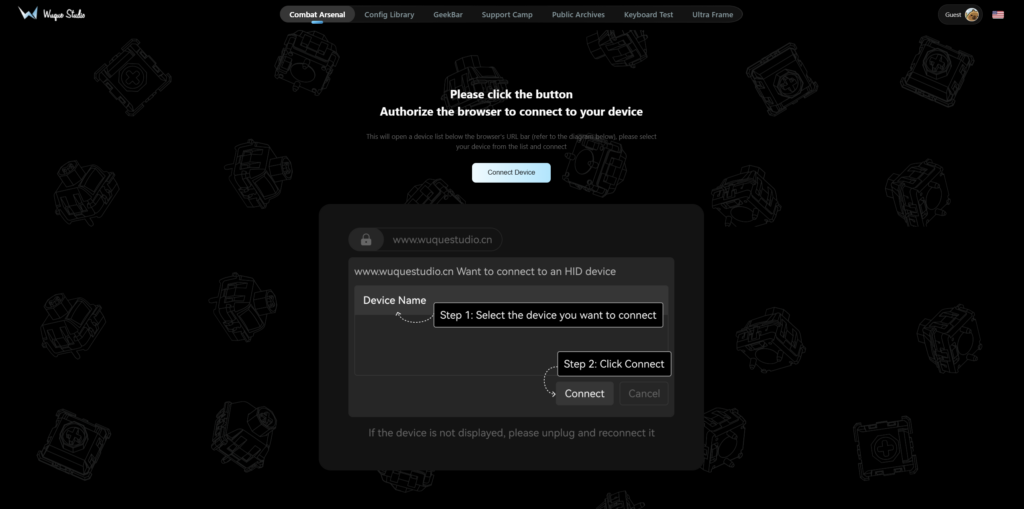
The web driver lives at drives-hid.wuquestudio.cn/hub, no download or install required.
Connecting the keyboard:
- Go to the driver site and click Connect Device.
- Your browser will prompt you to authorize the connection, a device list appears with your keyboard’s name (mine showed as “BABAO60 HE”).
- Select the device and click Connect.
The whole process was seamless, no driver installation, no compatibility issues, connected and recognized within seconds. If your device doesn’t show up in the list, unplugging and reconnecting the keyboard resolves it, per the driver’s own on-screen guidance.
Configuring actuation and Rapid Trigger:

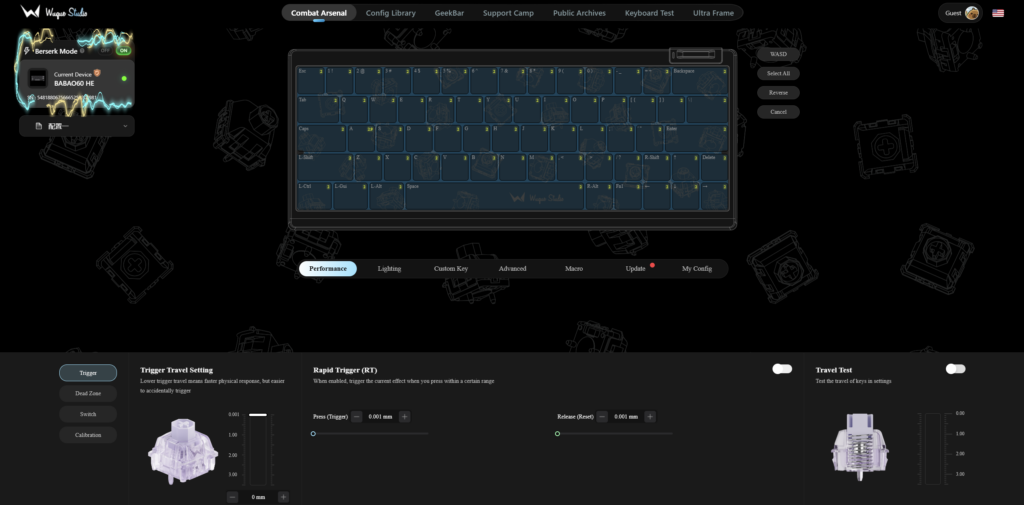
Once connected, the sidebar menu gives you Performance, Lighting, Custom Key, Advanced Key, Macro, My Config, Update/Restore, and My Device. The Performance tab is where the actual HE tuning happens:
- A visual keyboard layout at the top lets you click individual keys (or use the WASD / Select All / Reverse quick-select buttons) to choose which keys you’re configuring
- Under the Trigger tab, there’s a Rapid Trigger (RT) toggle and a Trigger Travel Setting slider with a precise millimeter input next to it
- Separate tabs handle Dead Zone, Switch behavior, and Calibration
For anyone new to hall effect tuning: Rapid Trigger means the key re-actuates as soon as you start releasing it, rather than needing to fully reset, and Trigger Travel is your actuation point, how far you need to press before the keystroke registers. Toggling RT on and adjusting the travel distance is the core of what makes this module genuinely useful for gaming, and doing it through this interface took no guesswork, the visual keyboard and live settings panel make it clear exactly what you’re changing and for which keys.
What Makes This an Analog Gaming Keyboard
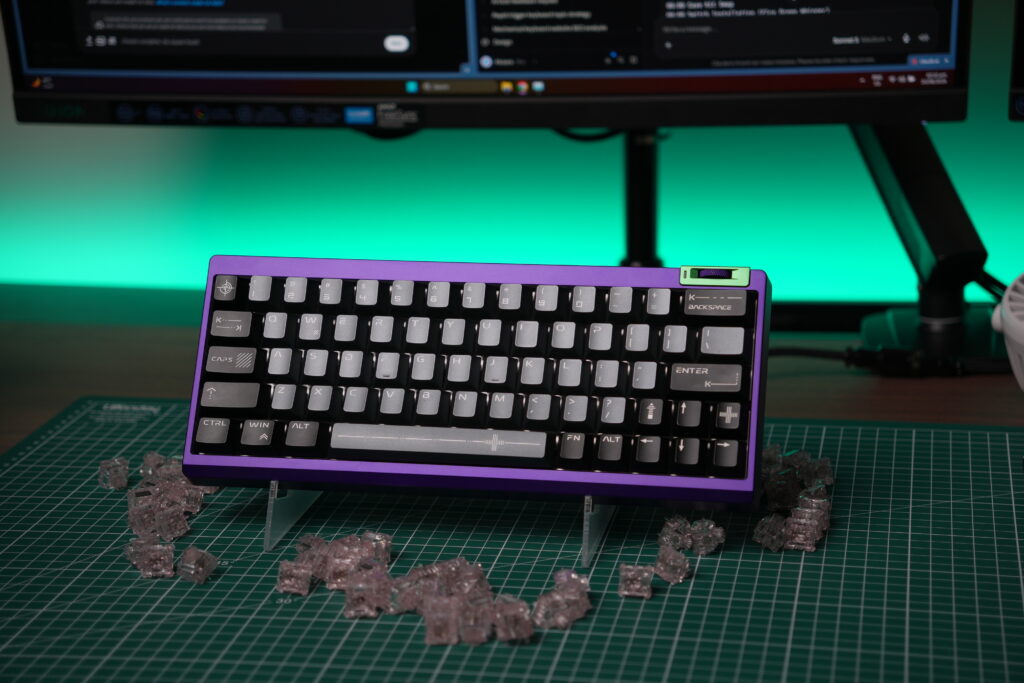
Hall effect (and the closely related magnetic/analog switch category) isn’t just a marketing buzzword here, it’s a genuinely different input method than a standard mechanical switch. If you’re not familiar with how hall effect keyboards actually work, or how they differ from optical and standard mechanical switches, it’s worth a quick read before diving into the specifics below. Instead of a fixed actuation point, HE switches detect the exact position of the switch as it travels, which is what enables features like adjustable actuation depth and Rapid Trigger. The Flux60 HE module supports a full set of these: SOCD (Simultaneous Opposite Cardinal Directions, for cleaner directional input), DKS (Dynamic Keystroke), MPT (Multi-Point Trigger), Multi-Tap, Toggle, and Release Trigger modes, the kind of feature set built specifically for competitive gaming scenarios where every millisecond and every clean input matters. If you’re also curious how this compares to TMR switch technology, we’ve covered that distinction separately.
Flux60 HE Module: The Technical Core
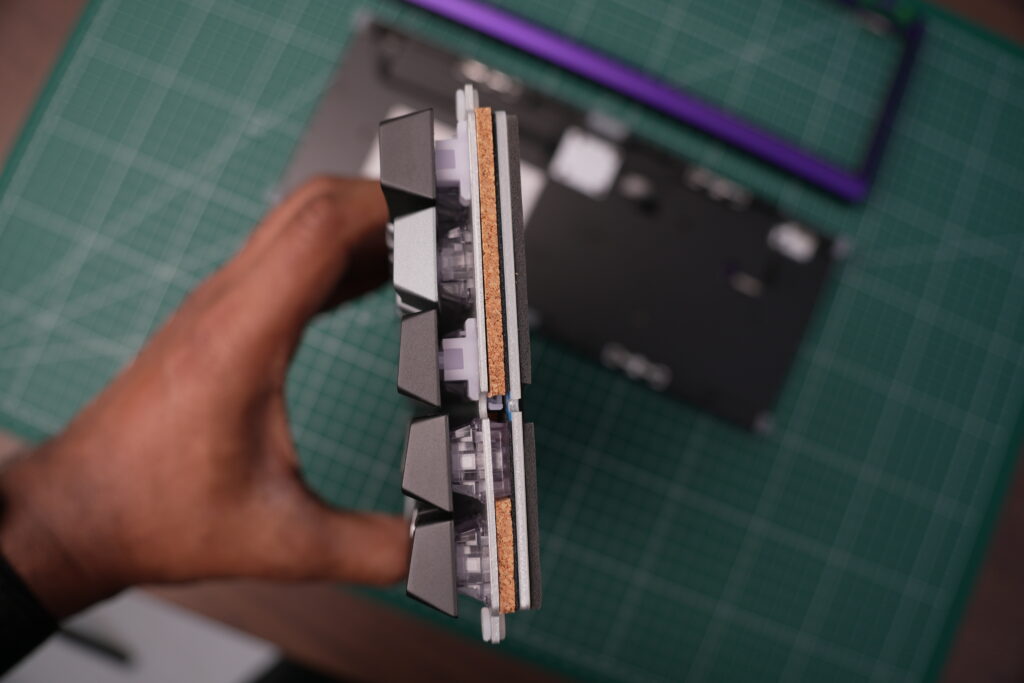
This module is the real engineering story of the build. It uses a 2mm aluminum PCB rather than the standard FR4 board most keyboards use, aluminum dissipates heat dramatically faster, which matters for long-term signal stability. On paper: 0.08ms latency, a 256KHz scan rate, and 8000Hz polling rate, the higher the polling rate, the more frequently your inputs are reported to your PC, which matters more for competitive gaming than everyday typing. In practice, using it for actual gaming, the low latency is immediately noticeable, this is a board built to showcase what hall effect hardware can actually do, not just claim it.
It’s wired-only (no wireless mode on this module), which is a reasonable trade-off given the performance target, competitive gaming setups are wired anyway more often than not.
The module also uses magnetic-switch-specific stabilizers rated for 3.5mm of travel, built to eliminate the “see-saw” wobble that badly-tuned stabilizers are known for on larger keys like the spacebar. It’s a small detail, but it’s the kind of thing that separates a genuinely engineered board from one that just bolted HE switches onto an existing design.
The Polaris Twin OS Driver: Feature Overview
Beyond the connection and actuation setup covered above, Polaris Twin OS supports up to 4 saved profiles (useful for switching between, say, a typing profile and a gaming profile instantly), broad switch compatibility across 19 switch types, and a Turbo Mode for extreme response speed. For a module this technically dense, having a driver that doesn’t feel like a spreadsheet is a real achievement, and having now actually used it end-to-end, that holds up.
WS Flux Ocean Whisper Switches
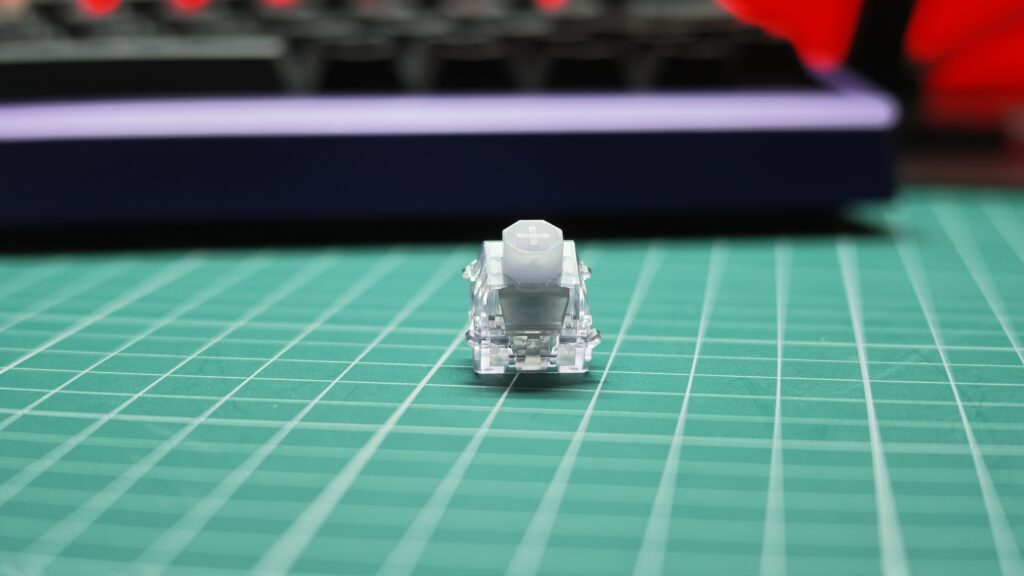
These switches lean heavier and thockier than I expected, not a light, airy linear feel, but something with real weight and presence behind every keystroke, closer to what you’d expect from our picks for the deepest, thockiest switches than a typical gaming linear. That matches Meletrix’s own described acoustic engineering: a 6-layer sound dampening stack (aluminum plate, cork plate foam, IXPE switch foam, PET acoustic pad, plus case foam) specifically built around these switches. If you want to hear it rather than read about it, the sound test at the 3:02 mark in the video is the best evidence. For more on how hall effect switches stack up as a category, see our hall effect switches roundup.
MCAPS Aluminum Keycaps
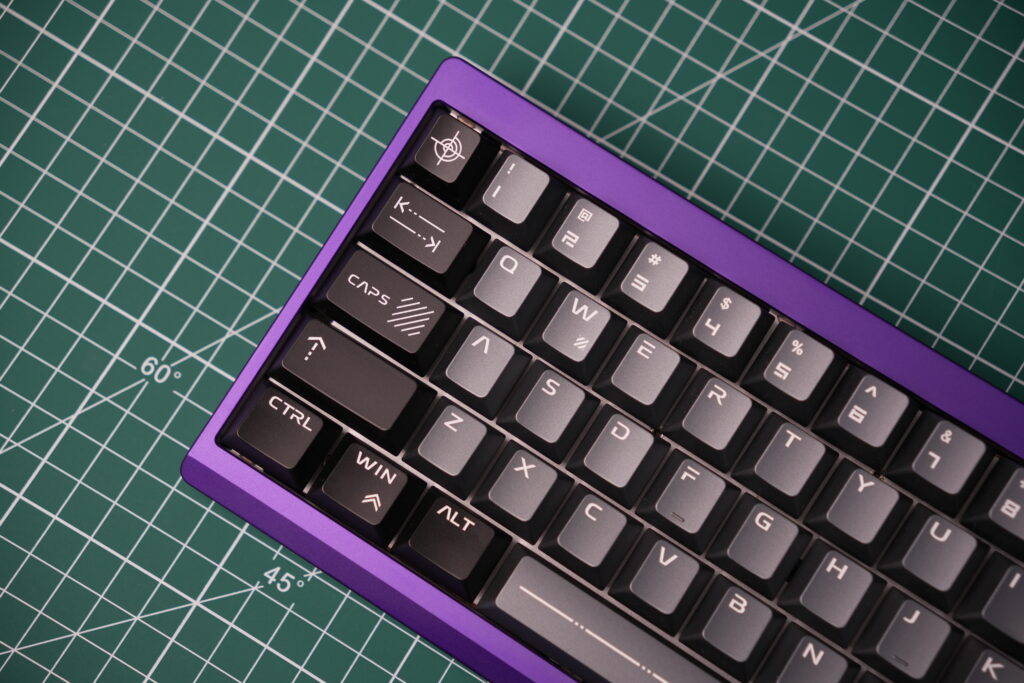
The aluminum keycaps are a genuinely cool addition to this build, not just a cosmetic upgrade. They’re made via die-casting and laser etching rather than full CNC machining, which Meletrix positions as achieving roughly 90% of a CNC keycap’s look and feel at a fraction of the cost and production time, and having used them, that claim holds up. Cherry profile, 1.6mm thick, with a nano-coating for scratch resistance. If you want the full rundown on keycap materials and profiles generally, our keycaps guide covers where aluminum sits relative to standard PBT and ABS options.
Weight and Build Quality
The whole build is heavy. Not “solid-feeling because it’s marketed that way”, genuinely, noticeably heavy in hand, and it translates directly into a feeling of durability rather than a burden. Nothing about this board feels like it’s cutting corners to save weight or cost.
Real-World Gaming Performance
This is where the hall effect spec sheet actually proves itself. The low latency is immediately noticeable in actual gameplay, and it’s a genuine showcase piece for what HE hardware is capable of, not a board that has the specs on paper but doesn’t translate to feel. If you’re deciding whether analog/HE switches are worth the jump from standard mechanical, this build is a strong argument for yes.
The Look
Neon Violet is a striking colorway, and it draws real, unprompted reactions. People see this on the desk and ask what keyboard it is, that’s not a subjective claim, it’s a repeated real-world reaction, and it says something that a lot of “premium” custom builds don’t reliably get.
How Much Does a Build Like This Cost?
$412 total for the case kit, HE module with switches included, and the keycap upgrade. That’s genuinely useful context if you’re trying to budget a first hall-effect custom build: this isn’t a $100 prebuilt, but it’s also not the $600-800+ territory some fully custom solder builds reach. It sits in a clear premium-but-accessible middle ground.
Where to Buy
All four components in this build are available directly from Meletrix:
- Zoom64 Case Kit — Neon Violet — $134
- Flux60 HE (Babao 60 HE) Module — $199, switches included
- MCAPS Aluminum Keycaps — $79
What is an analog gaming keyboard?
An analog or hall effect keyboard detects the physical position of a key as it’s pressed, rather than triggering at one fixed point. This enables features like adjustable actuation depth and Rapid Trigger, both aimed at competitive gaming precision.
How does the Flux60 HE compare to other HE modules like the Wooting 60HE V2 or Venom 6HE?
I haven’t personally tested those boards side-by-side with this one, so I can’t make a firsthand comparison. Independent reviewer Jerrorr, cited on Meletrix’s own product page, reported the Flux60 HE’s latency performance was competitive with both of those boards in their own testing.
What keycap material is MCAPS made from?
Die-cast and laser-etched aluminum, Cherry profile, 1.6mm thick, with a scratch-resistant nano-coating.
Does the Flux60 HE module work wirelessly?
No, it’s wired-only.
How much does a custom hall effect keyboard build cost?
This full kit, case, HE module with switches, and keycap upgrade, totaled $412. Costs vary significantly based on case material, module choice, and keycap set.
Verdict: 9/10
A genuinely impressive custom build: heavy, solid, visually striking, and backed by hall effect performance that holds up to real use, not just spec-sheet marketing. The build process was seamless, the driver is one of the better ones I’ve used, and the Neon Violet colorway turns heads. If you’re considering a first step into hall effect custom builds, this is a strong one to start with.
If you want to see how this compares against other hall effect boards, check our best hall effect keyboards roundup, or our individual reviews of the Epomaker HE80, Epomaker HE68 Lite, and Aula Win68 HE.