


VIA is the most powerful keyboard configuration software you can use without writing code. It lets you remap every key, create custom layers, program macros, and control RGB lighting- all in real time with no flashing required.
- What is VIA Keyboard Software?
- Known Limitations Before You Start
- Is My Keyboard VIA-Compatible?
- Getting Started: Web App vs Desktop App
- Troubleshooting: VIA Not Detecting Keyboard
- VIA Interface Overview
- How to Remap Keys in VIA
- Understanding Layers
- How to Create Macros
- Rotary Encoder (Knob) Programming
- RGB Lighting Control
- Save and Load Profiles
- VIA vs VIAL: Which Should You Use?
- Key Tester
- FAQ
If your keyboard supports VIA, you can change how every key behaves in seconds. This guide covers everything from first-time setup to advanced features like tap dance, combos, and rotary encoder mapping. The troubleshooting section is built from actual issues reported across Reddit, GitHub, and keyboard forums: not theoretical edge cases.
Tested-On Compatibility
| OS | Browser | VIA Version | Status |
|---|---|---|---|
| Windows 11 | Chrome 126 | 3.0.0 | ✅ Full support |
| Windows 11 | Edge 126 | 3.0.0 | ✅ Full support |
| macOS 14.5 Sonoma | Chrome 126 | 3.0.0 | ✅ Full support |
| macOS 15 Sequoia | Chrome 126 | 3.0.0 | ✅ Partial. Authorize dialog requires additional permissions on first connection |
| Linux (Ubuntu 24.04) | Chrome 126 | 3.0.0 | ⚠️ Full support with chrome://flags/#enable-webhid enabled |
| Linux (Fedora 40) | Firefox 127 | 3.0.0 | ❌ WebHID not supported. Use desktop app only |
| macOS / Linux | Desktop app (standalone) | 3.0.0 | ✅ Full support. Bypasses browser WebHID limitations |
| Any | Safari 18 | 3.0.0 | ❌ Not supported. Safari does not implement the WebHID API |
What is VIA Keyboard Software?
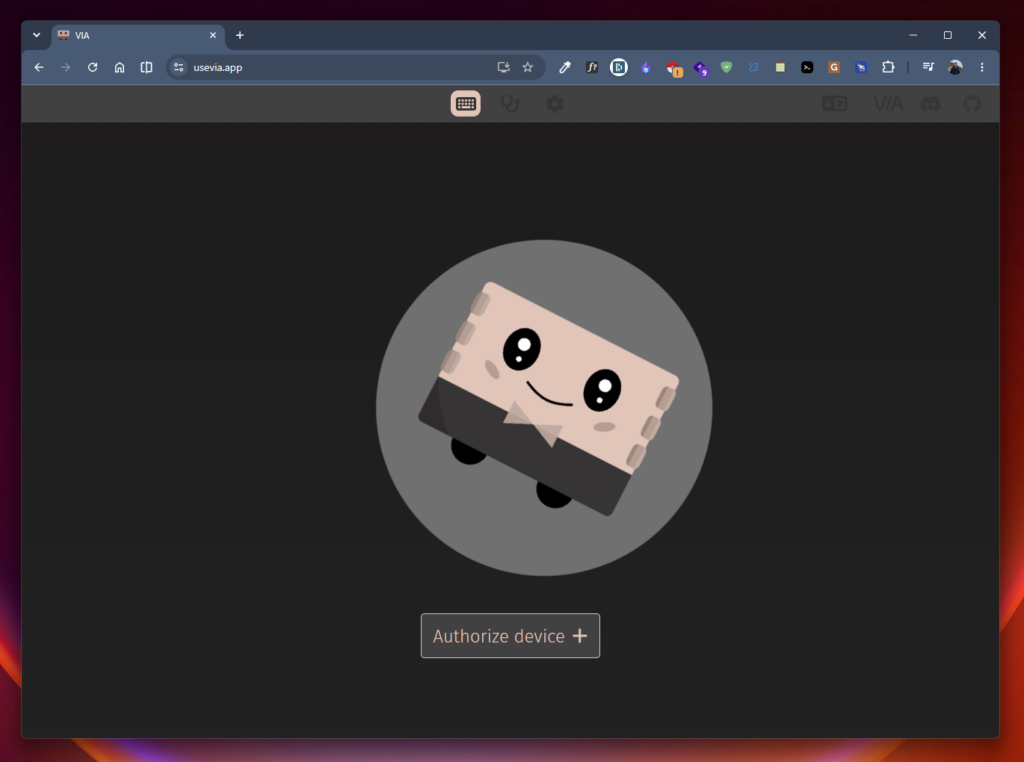
VIA is a graphical configuration tool that works with keyboards running QMK firmware. It communicates with your keyboard over USB and lets you change key assignments, create macros, manage layers, and control lighting on the fly.
Unlike traditional keyboard software that saves settings to your computer, VIA writes directly to your keyboard’s onboard memory. Your custom layout goes with the keyboard wherever you plug it in: different computer, different operating system, it does not matter.
VIA operates in two parts:
- The firmware: VIA-enabled QMK firmware flashed onto the keyboard. Most modern custom and enthusiast keyboards ship with this pre-installed.
- The app: A graphical interface that runs in your browser (via WebHID) or as a standalone desktop application.
The app and firmware talk to each other over USB. When you change a key in the app, the keyboard updates instantly. There is no compile step, no flashing, no reboot.

How it works under the hood:
VIA uses WebHID (Web Human Interface Device) API in the browser to communicate directly with the keyboard. This is why Chrome and Edge work but Safari does not: Safari does not implement WebHID. The desktop app wraps this in an Electron shell and talks to the keyboard via raw HID, which bypasses browser limitations.
Known Limitations Before You Start
This section is here because VIA has real-world quirks that published guides rarely mention. Knowing them upfront saves frustration.
- VIA requires USB for configuration. You cannot use VIA over Bluetooth. Once configured, your layout saves to onboard memory and works wirelessly, but any future changes need a USB cable.
- Safari users cannot use the web app. Use Chrome, Edge, or Brave, or download the desktop app.
- Firefox WebHID support is limited. As of July 2026, Firefox supports WebHID on Windows only (behind a flag) but not on macOS or Linux. Use the desktop app instead.
- VIA desktop app and web app are not interchangeable for saving profiles. If you save a profile in the web app, it works in the desktop app, but the desktop app stores recent configurations in a different local file. Save your configs as JSON exports.
- Some keyboards require a JSON definition file even though they ship with VIA firmware. This is normal. The JSON is a keyboard layout definition that VIA needs to display your key positions. It is not firmware.
- VIA 3.0.0 does not support Bluetooth-connected keyboards on Linux. The WebHID API on Linux enumerates only USB-connected HID devices.
- The “Authorize Device” popup may appear blank the first time you connect. This is a Chrome permissions issue, not a VIA problem. See the troubleshooting section below.
Is My Keyboard VIA-Compatible?
Check caniusevia.com for the official compatibility list. Most keyboards from these manufacturers support VIA:
- Keychron (Q series, V series, K Pro series: verify individual model)
- Epomaker (select models: the Epomaker Galaxy 100 Lite supports VIA in wired mode)
- NuPhy (Air75 v2, Air96, Halo series)
- MonsGeek
- Akko (select models)
- Lemokey
- RK Royal Kludge (select models)
- SKYLOONG
- Glorious (GMMK Pro, GMMK2)
- Most custom keyboards with QMK firmware
If your keyboard is not on the list, it may still work if the manufacturer provides a custom JSON definition file. Check the product page or contact support. Note that some keyboards, like the Aula F75, reserve VIA support for specific variants; always verify before buying.
Getting Started: Web App vs Desktop App
VIA runs in two modes. The web app is the simplest option for most users.
VIA Web App (Recommended for Most Users)
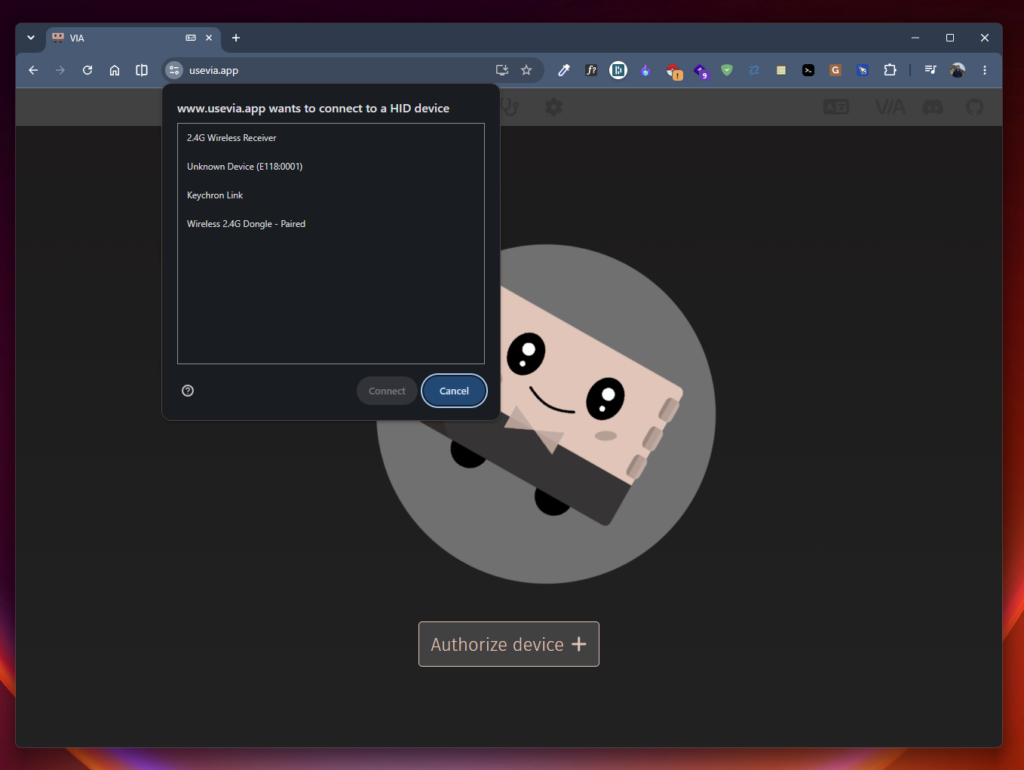
The web app runs in any Chromium-based browser (Chrome, Edge, Brave, Opera). No installation is required.
To use the web app:
- Open usevia.app in Chrome or Edge
- Plug your keyboard in via USB
- Click “Authorize Device +” and select your keyboard from the popup
- Start customising
VIA Desktop App
The desktop app is useful if you prefer an offline application or need to flash firmware. It is available for Windows, macOS, and Linux.
Download from: github.com/the-via/releases
The desktop app works identically to the web app once installed. Both connect to your keyboard over USB and offer the same features.
Why use the desktop app? If Chrome’s WebHID implementation gives you trouble- blank authorize popups, permissions not persisting- the desktop app bypasses the browser entirely. This is also the fallback for Linux users.
VIA Chrome App (Legacy)
Older guides reference the VIA Chrome App from the Chrome Web Store. This version is deprecated and no longer maintained. Use the web app at usevia.app instead.
Troubleshooting: VIA Not Detecting Keyboard
This is the most common issue users face. You open VIA, plug in your keyboard, and the screen says “Searching for devices” with nothing happening.
Below is a diagnostic decision tree- not a flat list. Find your symptom and follow the path.
Decision Tree: Your Keyboard Is Not Detected
Step 1: Is the “Authorize Device +” button visible?
→ YES → Click it. A browser popup should appear listing connected WebHID devices. → NO → You may be on a browser that does not support WebHID (Safari, Firefox on macOS/Linux). Switch to Chrome, Edge, or download the desktop app.
Step 2: Did the Authorize popup appear?
→ YES, with my keyboard listed → Select your keyboard and click Connect. If the Configure tab is still blank, you need a JSON file: see Section A below. → YES, but NO devices listed → Go to Step 3. → NO popup appeared → Check browser permissions. Chrome may be blocking WebHID. Go to chrome://settings/content/hid and ensure usevia.app is allowed. Reopen the page and try again.
Step 3: Popup appeared but no devices listed
→ Are you using a USB cable that supports data? Some cables are charge-only. Try a known data cable: preferably the one that came with your keyboard. → Are you using a USB hub? Plug directly into your computer’s USB port. → Are you on a different OS? This confirms a system-level issue. See Section C below.
Step 4: Keyboard listed in popup but Configure tab is blank
→ You almost certainly need a JSON definition file. See Section A below. → If you have the JSON and it loaded but the tab is still blank, see Section B: JSON file not loading.
Section A: Upload the JSON Definition File (The #1 Fix)
Many keyboards require a JSON definition file before VIA can recognize them. This is especially common with Keychron, NuPhy, and Epomaker boards where the VIA code is still awaiting GitHub approval.
Why do I need this? The JSON file tells VIA what physical layout your keyboard has: where each key is positioned, which keys exist, and which layout options (split spacebar, stepped caps lock, etc.) are available. Without it, VIA does not know how to draw your keyboard.
How to upload a JSON file:
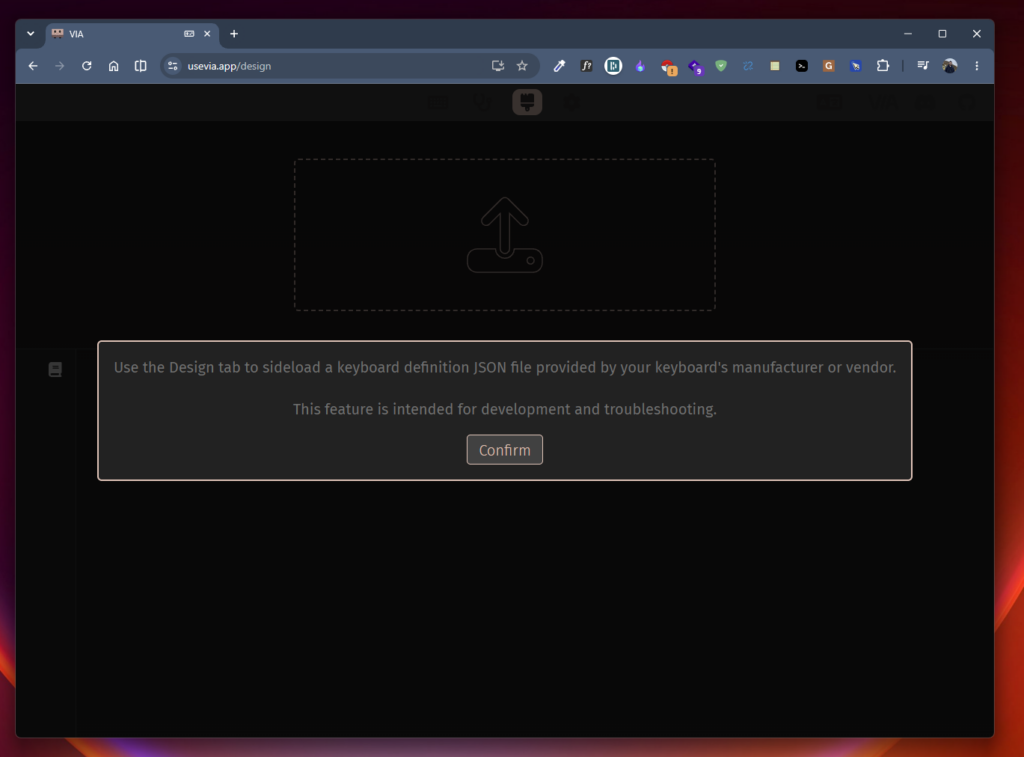
- Go to the Settings tab in VIA
- Enable “Show Design tab”
- Switch to the Design tab
- Drag your keyboard’s JSON file into the upload area at the top, or click “Load Draft Definition” and select the file
- Return to the Configure tab
- Click “Authorize Device +” again
Where to find the JSON file:
- Manufacturer product page (check the downloads or support section)
- Manufacturer GitHub repository
- Keychron JSON files: github.com/Keychron/Keychron-QMK-Firmware
- NuPhy JSON files: nuphy.com/pages/via-usage-guide-for-nuphy-keyboards
- CannonKeys JSON files: docs.cannonkeys.com/via-json-loading
Section B: JSON File Is Not Loading
If you drag the JSON into the Design tab and nothing happens (no keyboard layout appears), try these in order:
- Is the JSON for the right keyboard revision? V1 and V2 definitions are not interchangeable. Keychron Q1 v1 JSON does not work for Keychron Q1 v2.
- Check the JSON format. Open the file in a text editor. If you see a single long line of text, the JSON is minified: that is fine. If you see HTML tags, it is not a JSON file: you may have downloaded the firmware instead of the JSON.
- Is your JSON using V2 format? VIA 3.0.0 shows a red warning at the top of the Design tab if it detects a V2 definition. V2 definitions still work but may have missing features. Use V3 definitions if available.
- Did you enable the Design tab? This is the most common mistake. Settings → Show Design tab must be ON. If it is off, the Design tab does not appear at all.
Section C: Keyboard Not Detected on Any Browser or Cable
If the authorization popup is empty across multiple ports, cables, and browsers:
- Windows: Remove the device. Open Control Panel → Devices and Printers. Look for your keyboard under “Unspecified” or “USB Composite Device.” Right-click and select “Remove Device.” Unplug and replug the keyboard. Open VIA again.
- macOS: Reset the USB controller. Unplug all USB devices, restart your Mac, plug in only the keyboard, and try again.
- Try a different computer. If the keyboard works on another computer, the issue is system-specific USB drivers or security software. If it does not work on any computer, the firmware may lack VIA support: proceed to Section D.
Section D: Reflash Firmware
If the keyboard appears in the authorize popup but the Configure tab never loads, the firmware may be outdated or corrupted.
- Download the latest VIA firmware for your keyboard model from the manufacturer
- Open QMK Toolbox
- Put your keyboard in bootloader mode (check the manufacturer’s instructions: typically holding a reset button on the bottom of the PCB while plugging in)
- Select the firmware .hex or .bin file in QMK Toolbox
- Click Flash
- Unplug and replug the keyboard
- Open VIA
VIA Interface Overview
Once VIA detects your keyboard, you will see these tabs on the left sidebar:
| Tab | Function |
|---|---|
| CONFIGURE | Remap keys, manage layers, assign macros and lighting |
| TEST | Test key registration and switch functionality |
| MACROS | Create and manage macro sequences |
| LIGHTING | Control RGB and backlight effects (if supported) |
| SAVE + LOAD | Backup and restore keyboard configurations |
| SETTINGS | App preferences, show Design tab |
How to Remap Keys in VIA
Remapping a key is the most common task in VIA. The process takes seconds and updates your keyboard instantly.
Step-by-step:
- Open the CONFIGURE tab
- You will see a visual layout of your keyboard
- Click any key on the layout: it will flash slowly to indicate it is selected
- In the bottom panel, choose a key category:
- BASIC : Standard keys (A-Z, numbers, modifiers, navigation)
- MEDIA: Volume, play/pause, next track, mute
- MACRO: User-created macro sequences
- LAYERS: Layer switching keys (MO, TG, TO, TT, DF)
- SPECIAL: KC_NO (disable), KC_TRNS (transparent), reset, bootloader
- QMK LIGHTING: RGB controls (if supported)
- CUSTOM: Keyboard-specific functions
- Click the function you want to assign
- The keyboard updates immediately: no save button needed
The key you clicked in step 3 will now perform the new function. For a real-world example of what VIA layers look like in practice on a compact board, see our 60% keyboard shortcuts guide, which shows the complete FN layer configuration.
Why this works: When you click a key in VIA, it sends a HID report to the QMK firmware telling it which keycode the switch at that matrix position should produce. The firmware stores this in the keyboard’s EEPROM (non-volatile memory). This is why the change persists even after unplugging the keyboard: the new mapping is written to hardware, not to a software profile.
Understanding Layers
Layers are the most powerful feature in VIA. They let a single key do different things depending on which layer is active: this is how smaller keyboards like 60% boards and TKLs pack full-size functionality into compact layouts.
Think of layers like Shift on a standard keyboard. When you hold Shift, letter keys produce uppercase characters. Layers work the same way but with any key and any function you define.
VIA supports up to four layers by default (Layer 0, 1, 2, 3). Some keyboards with custom firmware support more.
Layer Switching Keys
| Keycode | Name | Behaviour |
|---|---|---|
| MO(layer) | Momentary | Activates the layer while held. Returns to previous layer on release. This is the most common layer switch. It works like an Fn key. |
| TG(layer) | Toggle | Activates the layer on press, deactivates on next press. Stays active after you release the key. |
| TO(layer) | Turn On | Goes to the specified layer and stays there. Does not return when released. |
| TT(layer) | Tap Toggle | Tap to momentarily activate, hold to toggle on, tap again to toggle off. Combines MO and TG. |
| DF(layer) | Default | Sets the specified layer as the default layer. Useful for switching between Mac and Windows layouts. |
Layer Precedence
Higher-numbered layers take priority over lower-numbered layers. Layer 3 overrides Layer 2, which overrides Layer 1, which overrides Layer 0. If a key on Layer 0 is set to “A” and the same position on Layer 1 is set to “B”, pressing the key while Layer 1 is active will produce “B”.
The Transparent Key (KC_TRNS)
KC_TRNS (shown as an inverted triangle in VIA) means “pass through to the next lower layer.” If a key on Layer 1 is set to KC_TRNS, pressing it will execute whatever is assigned to that position on Layer 0.
This is essential for layers that only change a few keys. Set most of the layer to KC_TRNS, then change only the keys that need different behavior.
Practical Layer Setup Example
Most keyboards come with this default layer arrangement:
- Layer 0: Standard QWERTY layout (base layer)
- Layer 1: Function keys, navigation, media controls (activated by MO(1))
- Layer 2: RGB controls (activated by MO(2))
- Layer 3: Mac/Windows layout switching or additional shortcuts
Mac/Windows layer handling: Keychron keyboards and several other brands ship with a physical Mac/Windows switch. When set to Mac mode, the keyboard uses Layer 0. When set to Windows mode, it uses Layer 2. This means Layer 1 activates on top of Layer 0 (Mac) and Layer 3 activates on top of Layer 2 (Windows). If you remap Layer 1 but the key does not change in Windows mode, check that you have edited Layer 3 as well.
To set up MO(1) for function keys:
- On Layer 0, pick a key you want to use as your Fn key (Caps Lock is a popular choice)
- Assign it as MO(1)
- Switch to Layer 1
- Assign function keys (F1-F12), media controls, or anything else to the positions you want
- Set all other positions on Layer 1 to KC_TRNS so they pass through to Layer 0
Now holding that key activates the Fn row. Releasing it returns to normal typing.
How to Create Macros
Macros let you trigger a sequence of keystrokes with a single key press. This is useful for typing email addresses, inserting code snippets, or executing complex shortcuts.
Creating a Macro
- Open the MACROS tab in VIA
- You will see slots labeled M0, M1, M2, etc.
- Click a slot to open the macro editor
- Two recording methods are available:
Method A: Record Keystrokes: Click “Record Keystrokes” and type the sequence on your physical keyboard. Click “Stop” when done. This captures the exact timing of your key presses.
Method B: Manual Entry: Type QMK keycodes directly into the editor using curly braces: {KC_LCTL}{KC_C}{KC_ENTER}. The editor provides autocomplete suggestions.
- Click “Save”
Assigning a Macro to a Key
- Go to the CONFIGURE tab
- Click the key you want to assign the macro to
- In the bottom panel, click the MACRO category
- Select your macro (M0, M1, etc.)
- The key now triggers the macro sequence
Macro Tips
- Use Fullscreen Record mode in the macro tab to record complex sequences across different applications
- You can edit the timing between keystrokes for natural-feeling automation
- Macros support all QMK keycodes, including modifiers and media keys
- Combine macros with layers to access 16+ macro slots across multiple layers
- Macro security note: Macros are stored on the keyboard’s firmware. If you use a shared computer, anyone with physical access can trigger your macros. Do not assign password-typing macros on a keyboard you do not control.
Rotary Encoder (Knob) Programming
Many VIA-compatible keyboards include a rotary encoder: the knob often used for volume control. VIA allows you to remap what the knob does on each layer.
How to Program the Encoder
If your keyboard supports encoder remapping in VIA, the encoder will appear as a dashed circle on the keyboard layout in the CONFIGURE tab.
- Click on the dashed circle
- The bottom panel will show two or three assignment slots:
- Clockwise rotation: what happens when you turn the knob clockwise
- Counter-clockwise rotation: what happens when you turn it counter-clockwise
- Press: what happens when you push the knob down (if supported)
- Assign any keycode to each action
Why this works: Rotary encoders produce digital signals (incremental quadrature) that QMK interprets as CW (clockwise) and CCW (counter-clockwise) events. VIA maps these events to any QMK keycode. On each layer, you can reassign the encoder independently: this is useful for switching between volume control on the base layer and tab switching on a function layer.
Common Encoder Configurations
| Use Case | Clockwise | Counter-clockwise | Press |
|---|---|---|---|
| Volume | KC_VOLU | KC_VOLD | KC_MUTE |
| Scroll | KC_WH_U | KC_WH_D | KC_BTN3 |
| Zoom | KC_LCTL(KC_EQL) | KC_LCTL(KC_MINS) | KC_LCTL(KC_0) |
| Brightness | KC_BRIU | KC_BRID | N/A |
| Tab switch | KC_LCTL(KC_TAB) | KC_LCTL(LSFT(KC_TAB)) | KC_LCTL(KC_W) |
You can set different encoder behavior on each layer. For example, volume on Layer 0 and tab switching on Layer 1.
RGB Lighting Control
If your keyboard supports RGB lighting, VIA provides control under the LIGHTING tab and through assignable lighting keycodes.
Lighting Tab Controls
- Lighting Effects: Choose from effects such as static, breathing, wave, reactive, ripple, spectrum, and more
- Speed: Adjust animation speed
- Brightness: Increase or decrease overall brightness
- Color: Pick a base color for single-color effects
- Direction: Reverse animation direction (where supported)
Assigning Lighting to Keys
In the CONFIGURE tab, the QMK LIGHTING category provides keycodes for controlling RGB from your keyboard:
- RGB_TOG: Toggle lighting on/off
- RGB_MOD: Cycle through lighting modes forward
- RGB_RMOD: Cycle through lighting modes backward
- RGB_HUI / RGB_HUD: Hue up/down
- RGB_SAI / RGB_SAD: Saturation up/down
- RGB_VAI / RGB_VAD: Brightness up/down
- RGB_SPI / RGB_SPD: Effect speed up/down
Important Note About Lighting
VIA controls lighting effects that are compiled into the keyboard’s firmware. It cannot create new lighting patterns. Custom animations must be coded into the QMK firmware and flashed separately.
Save and Load Profiles
The SAVE + LOAD tab lets you back up your keyboard configuration and restore it later.
To save a profile: 1. Go to the SAVE + LOAD tab
2. Click “Save” to download a .json file containing your current keymap, layers, and macros
3. Store this file safely
To load a profile: 1. Click “Load” and select a previously saved .json file
2. The configuration is written to your keyboard immediately
This is useful for: – Backing up your layout before experimenting – Sharing configurations between keyboards of the same model – Switching between work and gaming layouts
VIA vs VIAL: Which Should You Use?
VIAL is an open-source fork of VIA that adds features and bypasses some of VIA’s limitations.
| Feature | VIA | VIAL |
|---|---|---|
| Open source | No (proprietary) | Yes (GPL) |
| Real-time remapping | Yes | Yes |
| Layers | Up to 4 | Up to 32 |
| Combos | No | Yes |
| Tap dance | No | Yes |
| Key override | No | Yes |
| Macro slots | 16 | Unlimited |
| JSON file needed | Often | Built into firmware |
| Wireless support | Partial | Better |
| Security | No protection | Macro injection protection |
Use VIA if: Your keyboard shipped with VIA support, you only need basic remapping and layers, and you do not want to flash custom firmware.
Use VIAL if: You want combos, tap dance, more layers, or advanced macro capabilities. VIAL requires flashing VIAL-compatible firmware, which many keyboards support.
VIAL is backward compatible with VIA firmware. A keyboard running VIA firmware can be used with the VIAL app, though VIAL-only features will not be available until you flash VIAL firmware.
Key Tester
The TEST tab shows a live visual representation of your keyboard. Press a key, and it highlights on screen, displaying the matrix position and keycode.
This is useful for: – Verifying that every switch is functioning after a build or repair – Identifying which matrix position corresponds to a key during custom firmware development – Confirming that remapped keys register correctly: especially useful after setting up custom layers on small boards using our keyboard sizes guide
FAQ
Q: VIA says “Searching for devices” and my keyboard is plugged in. What do I do?
Use the decision tree in the troubleshooting section above. The most common fix is clicking “Authorize Device +” and selecting your keyboard. If that does not work, upload the JSON definition file via the Design tab.
Q: Where do I download the VIA app?
Use the web app at usevia.app (no download needed) or download the desktop app from github.com/the-via/releases.
Q: Can I use VIA wirelessly?
VIA requires a USB connection for configuration. Changes write to the keyboard’s onboard memory, so once configured, you can disconnect the cable and use the keyboard wirelessly with your custom layout saved.
Q: Will VIA work on Mac?
Yes. The web app works in Chrome on macOS, and the desktop app supports macOS natively.
Q: Does VIA save settings to the keyboard or to my computer?
Settings save directly to the keyboard’s onboard memory. Your custom layout stays with the keyboard regardless of which computer you plug it into.
Q: How do I reset my keyboard to factory defaults in VIA?
Flash the original factory firmware using QMK Toolbox, or use the manufacturer’s reset procedure. VIA does not have a “reset to default” button.
Q: Can I use VIA to flash new firmware?
No. VIA is a configuration tool. Use QMK Toolbox to flash firmware.
Q: Why is my JSON file not loading in VIA?
Enable the Design tab in Settings first. If it still does not load, check that the JSON is for the correct keyboard revision (V1 vs V2) and that it is actually a JSON file, not a firmware download.
Q: Can I have different layouts for different operating systems?
Yes. Use Layer 0 for Windows and Layer 3 for Mac. Assign DF(3) to a key to switch. Keychron keyboards use this pattern: Layer 0/1 for Mac and Layer 2/3 for Windows.
Q: What is the difference between VIA and QMK?
QMK is the firmware that runs on the keyboard microcontroller. VIA is a GUI that talks to QMK firmware. QMK handles the low-level keyboard logic; VIA provides a visual interface for changing QMK settings without recompiling code.