

Lubing switches is one of those upgrades that sounds intimidating until you actually sit down and do it. Once you understand how to lube keyboard switches, the process becomes almost meditative: open a switch, apply a small amount of lubricant to a few key points, snap it back together, and move on to the next one. The payoff is a keyboard that sounds smoother, feels more controlled, and loses the scratchy or rattly texture that stock switches often have.
- Quick Summary
- Lubricant Cheat Sheet
- Should You Lube Your Keyboard Switches?
- Tools & Materials You’ll Need
- Understanding Keyboard Switch Anatomy
- Choosing the Right Lubricant
- Time Required by Keyboard Size
- Step-by-Step Guide: How to Lube Keyboard Switches
- Common Mistakes to Avoid
- Troubleshooting Lubed Switches
- Factory-Lubed vs Hand-Lubed Switches
- Frequently Asked Questions
- Final Thoughts
This guide walks through everything a beginner needs, from the tools and lubricants to a full step-by-step process, common mistakes, and troubleshooting advice. Whether you are lubing your first switch or trying to refine a technique that has felt inconsistent, this is meant to be the only resource you need to open in a new tab while you work. If you are starting completely from scratch, it may help to skim the how to build a mechanical keyboard guide first, since lubing is usually one step within a larger build process rather than a standalone project.
Quick Summary
| Detail | Info |
| Difficulty | Moderate for beginners, easy after the first 10 switches |
| Time Required | Roughly 1 to 3 minutes per switch once comfortable |
| Estimated Cost | A basic lube kit typically runs in the $15 to $30 range |
| Best Lubricant | Krytox 205g0 for linears, Tribosys 3203 for tactiles |
| Skill Level | Beginner-friendly with patience, no soldering required |
Lubricant Cheat Sheet
| Switch Type | Recommended Lubricant |
| Linear | Krytox 205g0 |
| Tactile | Tribosys 3203 |
| Springs | GPL105 |
| Stabilizers | XHT-BDZ |
Keep this table handy while you shop. Most beginners overthink lubricant selection when, in practice, these four options cover the vast majority of switches on the market.
Should You Lube Your Keyboard Switches?
This is the question most people ask before they ever touch a switch opener, and it is worth answering honestly rather than assuming lubing is always the right move. Lubing is a modification, not a universal fix, and it changes the feel of a switch in ways that some typists prefer and others do not.
What Does Lubing Actually Do?
Lubricant reduces friction between the moving parts of a switch, mainly the stem as it travels through the housing and the spring as it compresses and releases. Less friction generally means less scratchiness, a quieter sound profile, and a smoother keystroke from top to bottom. It also tends to reduce spring noise, sometimes described as spring ping or spring crunch, which many builders find distracting during fast typing. The change is often described by reviewers as the difference between a switch that feels gritty and one that feels almost buttery, though the exact result depends on the switch, the lubricant, and how it is applied.
Which Switches Benefit the Most?
Linear switches tend to see the most dramatic improvement because their entire feel depends on a smooth, consistent downstroke with no bump to distract from friction. Tactile switches also benefit, though the goal shifts toward cleaning up the housing and spring without dulling the tactile bump itself. Clicky switches are the trickiest category. Many enthusiasts choose to leave the click jacket and leaf mechanism alone, since heavy lubrication can mute or entirely remove the click sound that defines the switch. If you are still deciding which category your switches fall into, the linear vs tactile vs clicky switches comparison breaks down the differences in more detail, and the broader mechanical keyboard switches guide covers switch types beyond what this article focuses on.
More Read

When Should You Avoid Lubing?
If you already like the way your keyboard sounds and feels, there is no requirement to lube anything. Some switches, particularly certain clicky designs, are built around dry internal friction as part of their sound signature, and lubing them can work against that design intent. It is also worth skipping lubrication if you are short on time before an event or deadline, since rushing the process is one of the most common causes of a bad result.
💡 Pro Tip: Before applying any lubricant, test your switches first. It’s much easier to spot a faulty switch before you spend time opening and lubricating it.
Tools & Materials You’ll Need
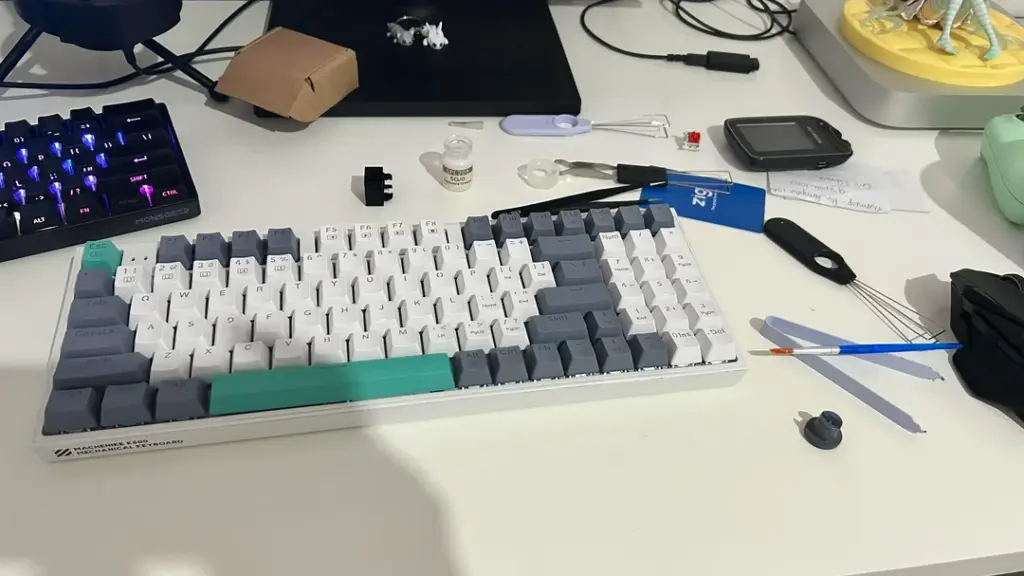
Before diving into the process, it helps to gather everything in one place. Nothing here is expensive, and most of it can be reused for future builds.
Essential Tools
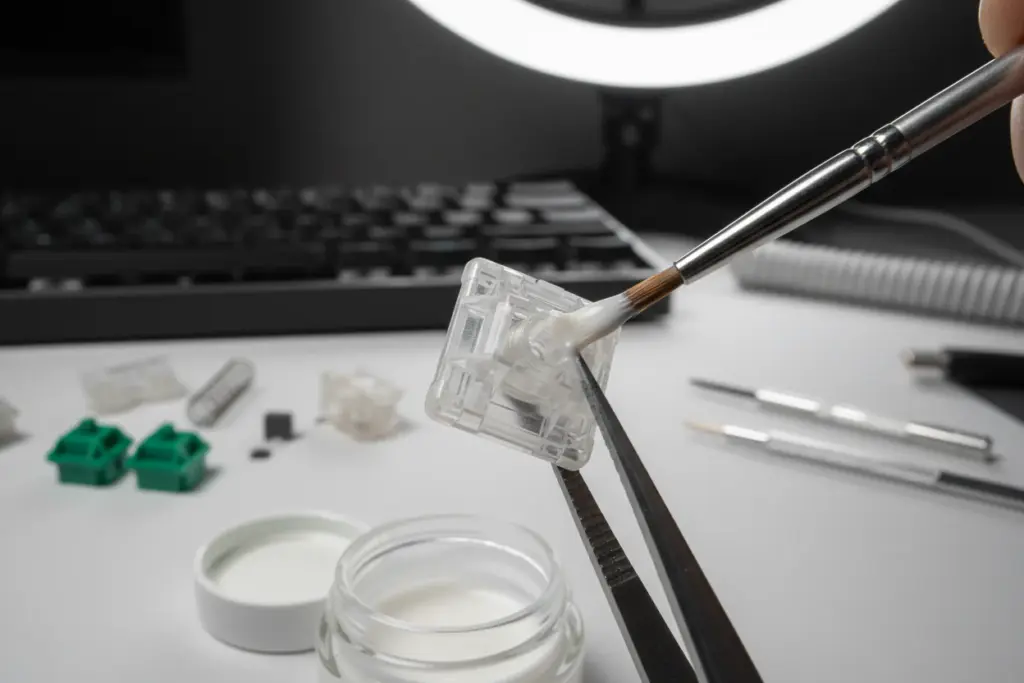
At a minimum, you will want a switch opener designed for your switch type, since prying switches open with a flathead screwdriver often damages the housing clips over time. A small brush, ideally something in the range of a size 0 or 00 detail brush, gives you the control needed to apply thin, even coats. Switch films are optional but frequently recommended alongside lubing, since they reduce housing wobble and can be installed at the same time. A tray or switch holder keeps opened switches organized so parts do not go missing mid-session.
Best Lubricants
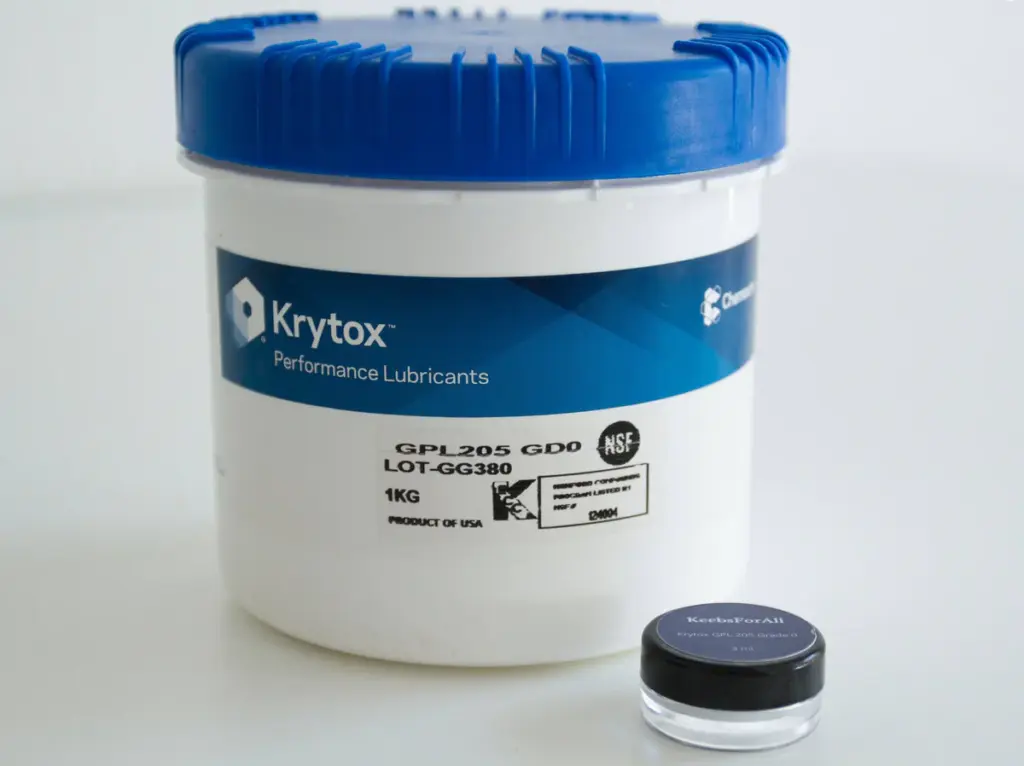
Krytox 205g0 has become something of a default recommendation for linear switches among the enthusiast community, largely because of its thicker consistency and long track record. Tribosys 3203 is a common pick for tactile switches, since it tends to preserve the bump better than thicker lubricants. For springs specifically, a thinner lube such as GPL105 is often favored because it coats without adding drag that could dull spring return speed. Stabilizers use a different category of lubricant entirely, with a dielectric grease like XHT-BDZ commonly used for the wire contact points and housing.
Optional Accessories
A switch puller and keycap puller speed up disassembly considerably. Small containers or bags help keep lubricant pots from spilling. Some builders also use a switch opener with a spring built in, which saves a step during reassembly.
Tool Checklist
| Item | Required or Optional | Notes |
| Switch opener | Required | Prevents cracked housings compared to a flathead screwdriver |
| Detail brush (size 0 or 00) | Required | Controls how much lubricant reaches the stem |
| Lubricant for stems and housing | Required | Krytox 205g0 or Tribosys 3203 depending on switch type |
| Lubricant for springs | Recommended | GPL105 or similar thin oil |
| Switch tray or container | Recommended | Keeps small parts organized during teardown |
| Keycap puller | Recommended | Needed before switches can be removed |
| Switch puller | Required for hot-swap boards | Removes switches without bending pins |
| Switch films | Optional | Reduces housing wobble alongside lubing |
| Lint-free cloth | Optional | Useful for wiping away excess lubricant |
Understanding Keyboard Switch Anatomy
Before applying lubricant anywhere, it helps to understand exactly what you are lubing and why each part matters. A keyboard switch might look like a single sealed unit from the outside, but it is actually five separate pieces working together, and each one plays a different role in how a keystroke feels and sounds. Understanding this breakdown makes the entire lubing process feel far less mysterious once you have a switch open in front of you.
Switch Anatomy Overview
| Part | Function | Lube Here? |
| Bottom housing | Base that holds the spring and guides the stem | Yes, inner rails only |
| Stem | Slides up and down, holds the keycap | Yes, on the four rails |
| Spring | Provides resistance and return force | Yes, light coat |
| Metal leaf | Completes the electrical contact | No |
| Top housing | Covers the assembly, may hold tactile or click parts | Sometimes, with caution |
Bottom Housing
The bottom housing is the base of the switch, the part that clips into the plate or PCB. It holds the spring in place and guides the stem as it travels down. Friction here is one of the most common sources of a scratchy feel.
Stem
The stem is the part your keycap sits on, and it is the piece that slides up and down inside the housing with every keystroke. Because the stem makes constant contact with the housing rails, it is usually the single most impactful part to lubricate carefully.
Spring
The spring provides the resistance you feel when pressing a key and the force that returns the key to its resting position. A poorly lubed or unlubed spring is often the source of the metallic pinging sound some switches produce.
Metal Leaf
The metal leaf, sometimes called the leaf spring, is what completes the electrical contact when the switch actuates. This piece requires extreme care, since any lubricant on the contact points can interfere with actuation.
Top Housing
The top housing is the cover that snaps onto the bottom housing and keeps everything contained. On tactile and clicky switches, this is often where the tactile leg or click mechanism lives.
Where Should You Apply Lubricant?
Generally, lubricant belongs on the stem rails, the inside walls of the housing where the stem contacts them, the spring, and lightly on the bottom of the stem where it meets the spring. Lubricant should not touch the metal leaf or any electrical contact points, and on clicky switches, the click mechanism is usually left untouched unless you specifically want to soften the click sound.
⚠ Common Mistake: Applying lubricant directly onto the leaf or contact points can cause a switch to stop registering keystrokes reliably.
Choosing the Right Lubricant
Picking a lubricant is less about finding a single “best” option and more about matching consistency to switch type and personal preference.
Best Lubes for Linear Switches
Linear switches typically pair well with a medium to thick lubricant, since there is no tactile bump to preserve and the main goal is eliminating scratch along the full travel of the stem. Krytox 205g0 remains a widely used choice for this reason, and some builders layer in a lighter lube for the spring specifically. Builders chasing a deeper, more muted sound alongside a smooth feel often pair this step with switches from the best thocky switches list.
Best Lubes for Tactile Switches
Tactile switches call for more restraint. A lubricant that is too thick can round off or mute the tactile bump, which defeats the purpose of choosing a tactile switch in the first place. Tribosys 3203 is popular here because it tends to smooth the housing and stem without significantly dulling the bump, though results vary by switch design. For switch recommendations before you start lubing, the best tactile switches roundup is a useful starting point.
Lubricants for Springs
Springs generally do best with a thinner oil rather than a thick grease, since the goal is reducing metallic noise without adding meaningful resistance to the spring’s natural movement. GPL105 is a common recommendation in this category.
Lubricants for Stabilizers
Stabilizers are a separate project from switch lubing, but many people tackle both at once. A dielectric grease designed for wire contact points, such as XHT-BDZ, helps reduce the rattle and tick that stabilizers are notorious for.
Which Lubricant Should Beginners Buy?
For a first attempt, picking up a small pot of Krytox 205g0 and Tribosys 3203 covers the two most common switch categories without requiring a large upfront investment. Both are widely stocked by keyboard specialty retailers and tend to last through hundreds of switches.
⭐ Beginner Recommendation: Start with just one lubricant on a handful of spare switches before committing to your entire board. It’s far easier to build technique on switches you are not attached to.
Lubricant Comparison
| Lubricant | Consistency | Best For | Notes |
| Krytox 205g0 | Medium to thick | Linear switches | Widely stocked, long track record among enthusiasts |
| Tribosys 3203 | Medium | Tactile switches | Tends to preserve the bump better than thicker options |
| GPL105 | Thin | Springs | Reduces spring noise without adding much drag |
| XHT-BDZ | Thick grease | Stabilizers | Used on wire contact points, not on switches themselves |
Time Required by Keyboard Size
Total time investment depends heavily on keyboard size, whether stabilizers are included, and how comfortable you already are with the process. If you have not settled on a layout yet, the mechanical keyboard sizes guide can help you weigh switch count against desk space before you buy. The estimates below assume a moderate pace for someone in their first few sessions.
| Keyboard Size | Approx. Switch Count | Estimated Time |
| 60% | Around 61 switches | 2 to 3 hours |
| TKL (Tenkeyless) | Around 87 switches | 3 to 4.5 hours |
| Full-size | Around 104 switches | 3.5 to 6 hours |
| With stabilizers included | Add 6 to 8 stabilizers | Add 30 to 60 minutes |
These numbers tend to drop significantly after the first full board, since most of the time in early attempts goes toward careful brush control rather than the mechanical steps themselves.
Step-by-Step Guide: How to Lube Keyboard Switches
This is the core process for lubing mechanical keyboard switches. Read through it once before starting so you know what to expect at each stage.
Step 1 – Remove the Keycaps & Switches
Start by pulling off every keycap with a keycap puller, working gently to avoid bending the stems. This is also a good time to inspect your mechanical keyboard keycaps for wear if you have been considering a set swap. Once the keycaps are off, remove the switches themselves. On a hot-swap board, this usually means using a switch puller to lift each switch straight up and out of its socket without wiggling side to side, which can bend the pins. On a soldered board, you will need to desolder each switch first, which is a more advanced process worth researching separately before attempting.
Step 2 – Open the Switch
Place the switch into your switch opener, or gently work a flathead tool around the four clips on the bottom housing if you do not have a dedicated opener. Apply light, even pressure around each clip rather than forcing one side open first, since forcing a single clip can crack the housing. Once the clips release, the switch should separate into its bottom housing, spring, stem, and top housing. Set these pieces down in the order you will need them so nothing gets mixed up between switches.
Step 3 – Lube the Spring
Drop the spring into a small container with a bit of your chosen spring lubricant, or dip and swirl it directly if you prefer working one at a time. The goal is a thin, even coat rather than a visible pool of lubricant sitting on the coils. Some builders lightly shake the springs in a container together to distribute lube evenly across a whole batch at once, which saves time on larger builds.
Step 4 – Lube the Stem
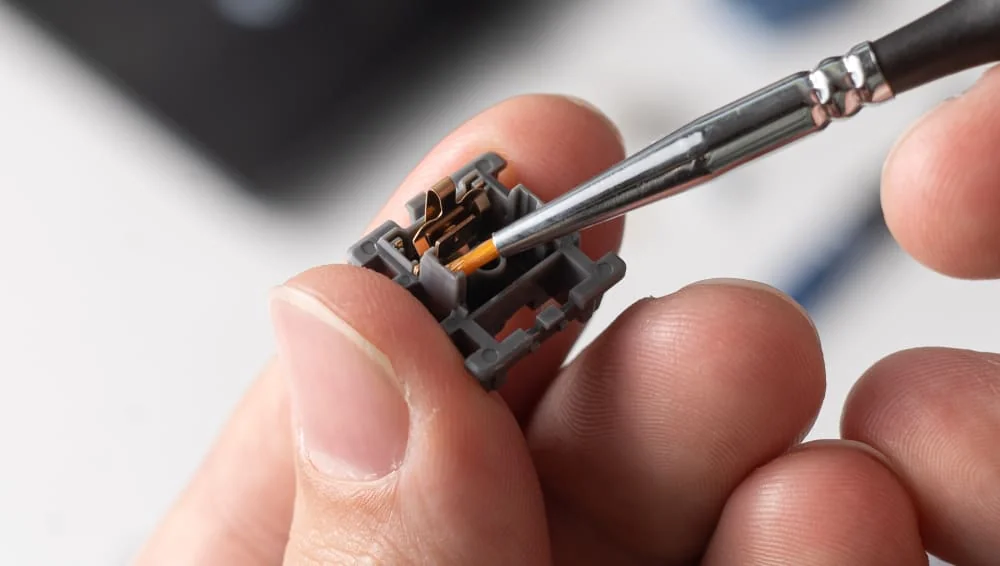
This is the step where technique matters most. Dip your brush lightly into the lubricant, then wipe off the excess against the side of the container until the brush looks nearly dry. Run the brush along the four rails of the stem, the parts that slide against the inside of the housing, using thin, controlled strokes.
Avoid the north pole of the stem on tactile switches, since this is often where the tactile leg makes contact and heavy lubrication here can dull or eliminate the bump. For linear switches, you have more flexibility to apply a slightly heavier coat across all four rails. Rotate the stem as you go so you can see each face clearly under good lighting, and resist the urge to go back over an area more than once. A common beginner mistake is treating this step like painting a wall, when in reality a switch stem needs closer to a fingerprint’s worth of lubricant per rail.
Step 5 – Lube the Bottom Housing
With the same lightly loaded brush, apply lubricant to the inner walls of the bottom housing where the stem rails will make contact, plus a small amount around the base where the spring sits. This is generally more forgiving than the stem, since there are no tactile mechanisms to worry about disturbing, but the same thin-coat principle still applies. Avoid getting lubricant near the terminals at the bottom of the housing where the metal leaf and pins are located.
Step 6 – Should You Lube the Top Housing?
The top housing is optional territory. Many builders apply a small amount to the inner rails where the stem slides through as it exits the top of the switch, which can further smooth the keystroke. On tactile and clicky switches, the top housing often contains the tactile leg or click jacket, and these mechanisms are usually best left alone unless you are intentionally trying to soften a tactile bump or muffle a click sound.
🔧 Troubleshooting Tip: If a tactile switch feels weaker after lubing, the top housing tactile leg is the most likely place lubricant ended up where it should not have.
Step 7 – Reassemble the Switch
Drop the freshly lubed spring into the bottom housing, then set the stem on top of it, making sure it is oriented correctly with the north pole facing the same direction it was originally. Place the top housing over the assembly and press down firmly until you hear or feel all four clips click back into place. Give the stem a gentle press to confirm it moves smoothly and springs back on its own before moving to the next switch.
Step 8 – Reinstall the Switches
Once you have a batch of switches lubed and reassembled, install them back into the plate or PCB the same way you removed them, making sure the pins line up correctly with the hot-swap sockets or solder points before applying pressure. Push straight down evenly rather than at an angle, since bent pins are one of the most common causes of a switch failing to register after reinstallation.
Step 9 – Test Every Switch
Before putting the keycaps back on, test every single switch using your keyboard’s software or a basic key tester. This step catches bent pins, misaligned stems, or switches that were not fully clipped back together. It is far easier to fix a problem now than after the board is fully reassembled with keycaps on.
Common Mistakes to Avoid
Most bad lubing experiences trace back to one of these five issues.
Using Too Much Lubricant
Excess lubricant does not make a switch smoother past a certain point. Instead, it adds drag, slows the stem’s return, and can even cause the stem to stick partway through its travel. A thin, even coat almost always outperforms a heavy one.
Lubing Tactile Legs
Applying lubricant directly onto the tactile leg or bump mechanism is one of the fastest ways to turn a tactile switch into something that feels closer to a linear. If preserving tactility matters to you, keep the brush away from this area entirely.
Mixing Different Lubricants
Combining multiple lubricants on the same switch, especially ones with different consistencies or chemical bases, can produce unpredictable results and inconsistent feel across your board. Stick to one lubricant per part type.
Forgetting to Test Switches
Skipping the testing step means problems only surface after the entire board is reassembled, which turns a five-minute fix into a much longer teardown. Always test before moving on.
Losing Springs or Stems
Small parts are easy to lose, especially springs that can spring out of the housing during disassembly. Working over a tray or shallow container prevents a lot of frustration later in the project.
Troubleshooting Lubed Switches
Even careful work sometimes produces a switch that does not feel right. Here is how to diagnose the most common issues.
Switch Feels Mushy
A mushy feel usually points to too much lubricant on the stem or bottom housing. Reopening the switch and wiping away the excess with a lint-free cloth often resolves it without needing to relube from scratch.
Switch Lost Tactility
If a tactile switch suddenly feels linear, lubricant likely made contact with the tactile leg or bump. Unfortunately, this often means reopening the switch, cleaning the affected area thoroughly, and being more conservative with the brush on the next attempt.
Spring Ping Didn’t Go Away
Persistent spring ping after lubing can mean the spring was not fully coated, or the specific spring itself is prone to noise regardless of lubrication. Try relubing the spring with a slightly heavier coat, or consider swapping to a different spring if the issue persists.
Switch Doesn’t Register
A switch that fails to register after reassembly is almost always a mechanical issue rather than a lubrication issue. Check for bent pins, lubricant on the metal leaf, or a stem that is not seated correctly against the spring.
Factory-Lubed vs Hand-Lubed Switches
Many switches now ship pre-lubed from the factory, which raises a fair question about whether hand lubing is still worth the effort.
Key Differences
| Factor | Factory-Lubed | Hand-Lubed |
| Consistency | Often applied by machine, can be uneven | Fully controlled by the builder |
| Customization | Fixed lubricant and amount | Choice of lubricant and thickness per part |
| Time Required | None | Roughly 1 to 3 minutes per switch |
| Typical Quality | Ranges from decent to excessive depending on brand | Generally higher when done carefully |
Which One Should You Choose?
Factory-lubed switches are a reasonable starting point for anyone who wants a smoother feel without the time investment, and many modern factory lubes have improved significantly compared to a few years ago. That said, factory application is rarely as targeted as hand lubing, and some batches end up over-lubed or unevenly coated. If you already own a switch opener and enjoy the process, hand lubing generally produces a more consistent and personalized result, particularly for anyone chasing a specific sound or feel. For beginners still deciding whether the hobby side of mechanical keyboards is for them, starting with factory-lubed switches and upgrading later is a perfectly reasonable path.
Frequently Asked Questions
Do I need to lube every switch on my keyboard?
No, lubing is optional and purely a preference-based modification. Some typists prefer the stock feel of their switches, especially clicky switches where lubrication can mute the sound. If you enjoy how your board currently feels, there is no requirement to change anything.
How long does it take to lube a full keyboard?
For a full-size keyboard with around 104 switches, expect somewhere in the range of 3 to 6 hours depending on experience level and whether you are also lubing stabilizers. Smaller boards obviously take less time proportionally.
Can I use too little lubricant?
Yes, though it is a far less common problem than using too much. A very thin or patchy coat may leave some scratchiness behind, in which case a light second pass usually fixes it without needing to strip the switch down further.
Is Krytox 205g0 good for all switch types?
Krytox 205g0 works well for most linear switches and is often used on tactile switches too, though some builders prefer a thinner option like Tribosys 3203 for tactiles to better preserve the bump.
Do I need switch films if I am already lubing?
Films and lubing address different issues. Films reduce housing wobble and rattle, while lubing addresses friction and sound from movement. Many builders do both at the same time since the switch is already open.
Can lubing damage my switches?
Lubing itself will not damage a switch, but applying lubricant to the metal leaf or contact points can interfere with actuation, and excessive force while opening the housing can crack the plastic. Careful, patient technique avoids both issues.
What brush size should I use?
A size 0 or 00 detail brush is a common recommendation, since it is small enough for precise application without holding excess lubricant that leads to over-application.
Should beginners start with a hot-swap board?
Yes, a hot-swap board makes switch lubing significantly easier since switches can be removed and reinstalled without any soldering, which is ideal while you are still building confidence with the process.
Why does my switch feel scratchy even after lubing?
Scratchiness that persists after lubing is often a sign that the coat is too thin or missed some of the rail surface. Reopening the switch and applying a slightly heavier, more even coat to all four rails usually resolves it.
Can I relube a switch that already has factory lube?
Yes, though it helps to clean off excess factory lube first if it looks heavy or uneven. Adding more lube on top of a thick factory coat can push the switch into over-lubed territory.
Final Thoughts
Learning how to lube keyboard switches is one of the most rewarding upgrades in the mechanical keyboard hobby, mainly because the improvement in feel and sound is so noticeable compared to the relatively low cost and effort involved. Anyone who finds their switches scratchy, noisy, or inconsistent is a good candidate for this project, while those who are already happy with their stock feel can safely skip it.
For a first attempt, Krytox 205g0 paired with Tribosys 3203 covers the two most common switch types and gives you a reasonable range to experiment with before deciding whether to expand into more specialized lubricants. Take the process slowly, test switches as you go, and treat the first few as practice rather than a finished product. Once the technique clicks, lubing becomes a fast, almost routine part of building or maintaining a keyboard, and it is one of the clearest ways to make a stock board feel like your own.