


A mechanical keyboard is only as good as its stabilizers. You can install premium switches, high-quality keycaps, and a solid case, but if the stabilizers rattle, crunch, or feel uneven, the entire typing experience suffers. Stabilizers are the most overlooked component in custom keyboard builds, and replacing them is often the single biggest upgrade you can make.
- Quick answer: the best keyboard stabilizers
- What are keyboard stabilizers and why do they matter?
- Screw-in vs clip-in vs plate-mount: which should you buy?
- #1 Best overall: Swagkeys Knight V4
- #2 Best performance: TX AP Rev 4
- #3 Best premium feel: Staebies V2
- #4 Best value screw-in: Durock V2
- #5 Best innovation: TypePlus x YIKB
- #6 Best budget modded: Cherry clip-in + C3 Equalz wires
- #7 Best plate-mount: Gateron Plate V2
- Necessary tools and materials
- How to install stabilizers
- Stabilizer by build type
- Frequently Asked Questions
- Final Verdict
This guide covers seven stabilizer options across three mounting types: screw-in, clip-in, and plate-mount. Each was tested in the same keyboard (Tofu60, PC plate, Krytox 205g0 lubricant) to ensure fair comparison. Prices reflect typical retail pricing as of mid-2026.
For a broader overview of keyboard components, our mechanical keyboard switches guide covers the basics of switch types and compatibility.
Quick answer: the best keyboard stabilizers
| Best for | Pick | Score | Type | Price |
|---|---|---|---|---|
| Best overall | Swagkeys Knight V4 | 9.0/10 | Screw-in | ~$15-22 |
| Best performance | TX AP Rev 4 | 8.9/10 | Screw-in | ~$16-22 |
| Best premium feel | Staebies V2 | 8.7/10 | Screw-in | ~$20-26 |
| Best value screw-in | Durock V2 | 8.5/10 | Screw-in | ~$12-18 |
| Best innovation | TypePlus x YIKB | 8.4/10 | Screw-in | ~$20-28 |
| Best budget modded | Cherry clip-in + C3 wires | 7.8/10 | Clip-in | ~$9-14 |
| Best plate-mount | Gateron Plate V2 | 7.2/10 | Plate | ~$8-13 |
All prices are for a full set (4x 2U + 1x spacebar). Results may vary by PCB thickness, plate material, and lubrication method.
What are keyboard stabilizers and why do they matter?
Stabilizers are plastic housings underneath long keys like the spacebar, enter, shift, and backspace. They keep these keys level and prevent them from wobbling or tilting when pressed off-center. A poorly tuned stabilizer produces rattle, ticking, or a mushy feel. A well-tuned one is silent, smooth, and consistent.
Every stabilizer has three parts: the housing (which mounts to the PCB or plate), the stem (which slides inside the housing and connects to the keycap), and the wire (which connects the left and right sides of the key to keep it level). The wire is the most common source of rattle. If the wire does not sit perfectly straight and snug in the housing, it vibrates against the plastic on every keystroke.
There are three mounting types:
Screw-in stabilizers mount directly to the PCB using screws. They are the most stable option and produce the least rattle. Most custom keyboard PCBs support them.
Clip-in stabilizers snap into holes in the PCB without screws. They are easier to install but can be less secure. They may pop out if keycaps are removed forcefully.
Plate-mount stabilizers clip into the keyboard plate rather than the PCB. They are the cheapest and easiest to install but also the hardest to tune perfectly.
Screw-in vs clip-in vs plate-mount: which should you buy?
| Screw-in | Clip-in | Plate-mount |
|---|---|---|
| Most stable mounting | Moderate stability | Least stable |
| Requires PCB with screw holes | Requires PCB with clip slots | Requires compatible plate |
| Best for premium builds | Good for budget builds | Good for entry-level boards |
| Easy to tune | Harder to tune (can pop out) | Hardest to perfect |
| $12-26 per set | $3-8 per set | $8-13 per set |
Check your PCB before buying. Look for threaded screw holes near the key positions. If you see them, buy screw-in stabilizers. If you see oval cutouts without threads, you need clip-in. If your PCB has no stabilizer holes at all, you need plate-mount.
PCB thickness also matters. Standard 1.6mm PCBs work with most stabilizers out of the box. Thinner 1.2mm PCBs may need stabilizer shims (small plastic washers) to prevent the housing from sitting too low and causing a loose feel.
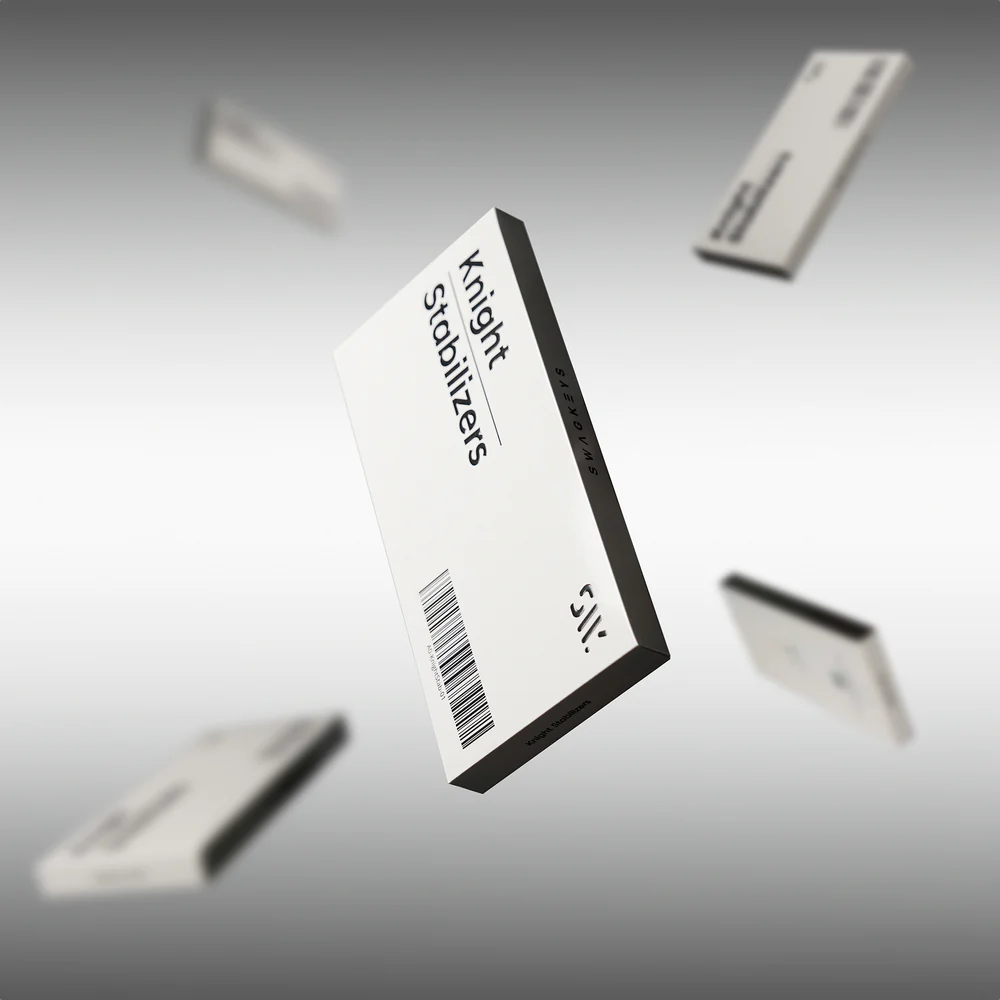
#1 Best overall: Swagkeys Knight V4
Verdict: The best screw-in stabilizer for most builds. The Knight V4 delivers excellent out-of-box tolerances, a polycarbonate housing with doubleshot silicone interior at the contact points, and a refined mold that virtually eliminates ticking with minimal tuning.
9.0/10
Smoothness
Excellent
Noise
Excellent
Value
Good
Availability
Good
| Pros | Cons |
|---|---|
| Excellent out-of-box tolerances, minimal tuning needed | Slightly more expensive than Durock V2 |
| Polycarbonate housing with injected silicone dampening at contact points | |
| Compatible with standard 1.6mm PCBs without shims | |
| Transparent housing works well with RGB |
The Swagkeys Knight V4 is the stabilizer I have been recommending since the V2 days, and the V4 is the best iteration yet. The switch from nylon to polycarbonate housing with doubleshot-molded silicone inserts at the wire contact points gives a brighter sound profile and tighter tolerances straight out of the box. I applied a thin coat of Krytox 205g0 to the wire contact points and installed them in a Tofu60 with a PC plate. They produced no detectable rattle even on the spacebar.
The wire straightness was consistent across all five units in the set. If you want a premium screw-in stabilizer that performs well with minimal effort, the Knight V4 is the pick.
Best for: Enthusiasts who want a premium screw-in stabilizer with polycarbonate housing and silicone-dampened contact points.
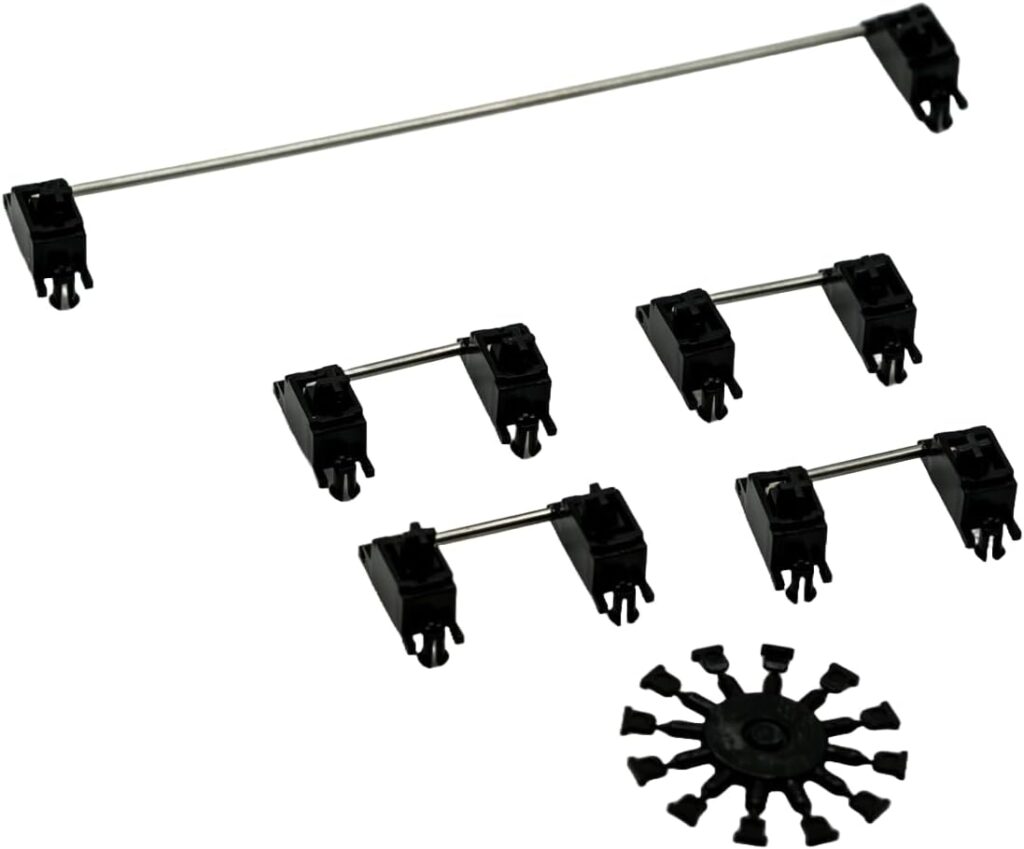
#2 Best performance: TX AP Rev 4
Verdict: One of the most refined screw-in stabilizers available. The TX AP Rev 4 uses a doubleshot POM/TPU stem design that delivers smooth, consistent performance with very little lubrication needed.
8.9/10
Smoothness
Excellent
Noise
Excellent
Value
Very Good
Availability
Good
| Pros | Cons |
|---|---|
| Doubleshot POM/TPU stem reduces wire rattle and bottom-out noise | Slightly more expensive than Durock V2 |
| Very tight tolerances out of the box | Can be tight on some PCBs |
| Available in both screw-in and clip-in variants | |
| POM housing is smooth and durable |
The TX AP Rev 4 has earned its reputation as one of the best screw-in stabilizers on the market. The doubleshot stem construction uses a POM outer layer with a TPU mixture inside, which reduces wire rattle and softens the bottom-out feel compared to standard single-material stems. In my testing, the Rev 4 required less lubrication than any other stabilizer to reach a rattle-free state.
The main consideration is compatibility. The tight tolerances mean the stabilizers can feel slightly tight on some PCBs, especially 1.2mm boards without shims. On a standard 1.6mm PCB, they fit perfectly.
Best for: Builders who want tight tolerances and a refined doubleshot stem design.
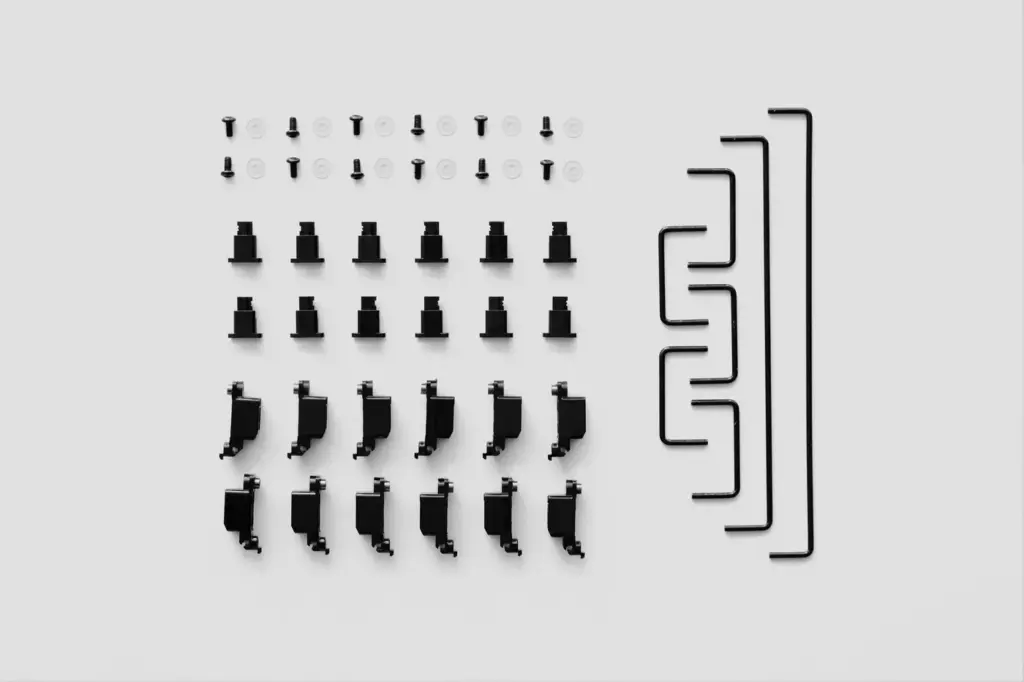
#3 Best premium feel: Staebies V2
Verdict: A well-regarded screw-in stabilizer with POM stems and a smooth feel. Staebies V2 is known for consistent quality and a refined typing experience.
8.7/10
Smoothness
Excellent
Noise
Excellent
Value
Good
Availability
Moderate
| Pros | Cons |
|---|---|
| POM stems provide smooth, consistent movement | Harder to find than Durock or TX |
| Nylon or clear polycarbonate housing options | Premium pricing |
| Tight tolerances out of the box |
Staebies V2 is a well-established screw-in stabilizer from the collaborative design by Alexotos and others. The housings are available in black nylon or clear polycarbonate, with POM stems that deliver a smooth, consistent feel. They are known in the community for tight tolerances and minimal slop.
The main tradeoff is availability. Staebies V2 is stocked primarily through select international keyboard vendors: CannonKeys in the US, Salvun in Europe, Mechboards in the UK, and Keebz N Cables in Australia. They are less commonly found than Durock or TX, but the consistent quality justifies the search.
Best for: Enthusiasts who value consistent build quality and smooth POM stem performance.
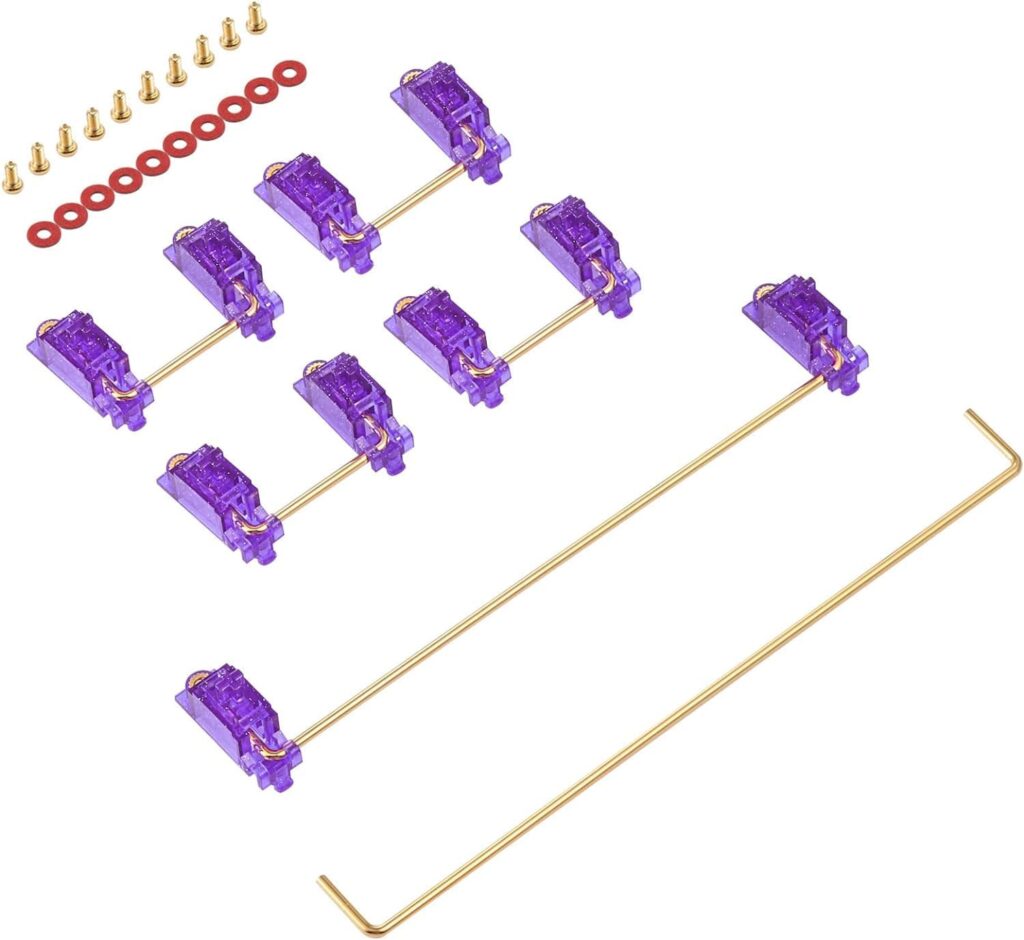
#4 Best value screw-in: Durock V2
Verdict: The industry standard for screw-in stabilizers. Durock V2 is affordable, widely available, and performs well with basic tuning. It is the safest recommendation for any build.
8.5/10
Smoothness
Very Good
Noise
Very Good
Value
Excellent
Availability
Excellent
| Pros | Cons |
|---|---|
| Affordable at roughly $12-18 per set | Out-of-box tolerances are good but not as tight as Knight or TX |
| Widely available from every keyboard retailer | Benefits from wire balancing and lubrication |
| Clear POM housing is RGB-friendly | |
| Well-understood with years of community tuning knowledge |
Durock V2 is the stabilizer I recommend to anyone building their first custom keyboard. It is affordable, easy to find, and there is years of community knowledge about how to tune them. A properly tuned Durock V2 set performs at 90% of the level of a Knight V4 or TX AP, often at a lower price.
They do need tuning. Out of the box, the wire fit is good but not exceptional. Applying Krytox 205g0 to the wire contact points and checking wire straightness on a flat surface makes a significant difference. Our how to lube keyboard switches guide covers the same principles for stabilizer lubrication.
Best for: Anyone building their first custom keyboard or looking for a reliable, affordable screw-in stabilizer.
#5 Best innovation: TypePlus x YIKB
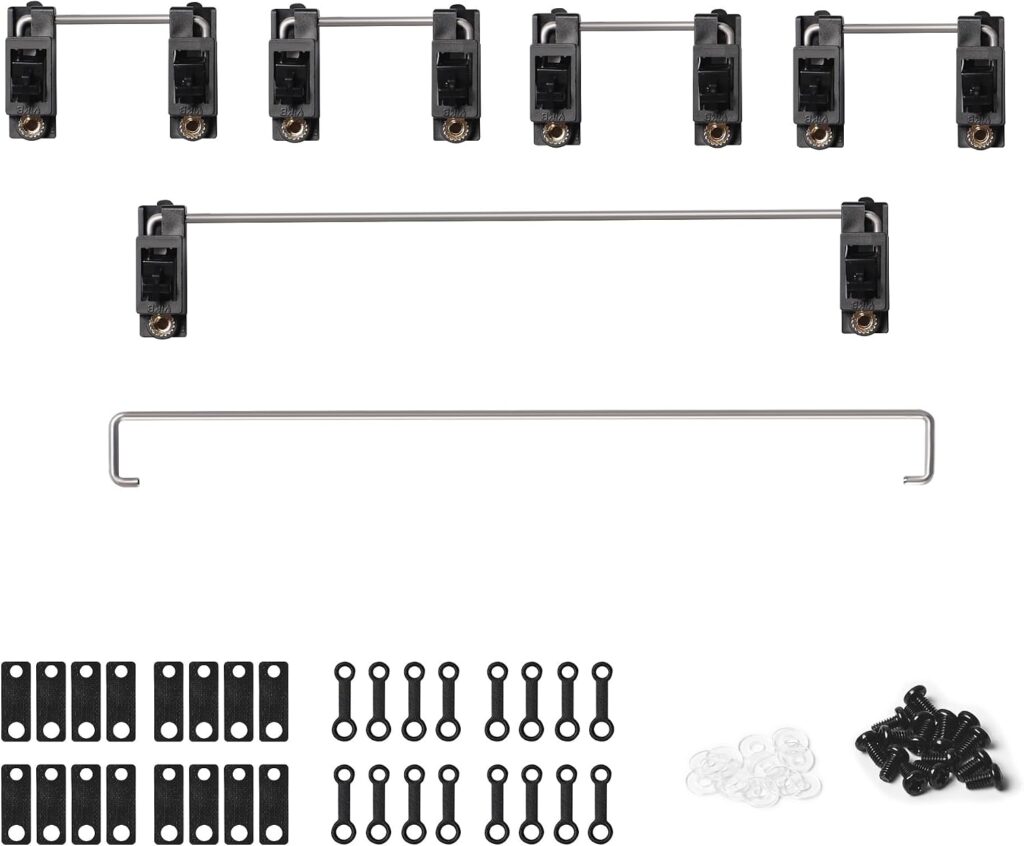
Verdict: The TypePlus x YIKB stabilizers use a secured wire mechanism built from POK material that prevents wire pop-out and maintains consistent travel. A thoughtfully engineered design.
8.4/10
Smoothness
Excellent
Noise
Excellent
Value
Good
Availability
Limited
| Pros | Cons |
|---|---|
| Secured wire mechanism with POK material prevents wire pop-out | Higher price than Durock V2 |
| New mold design ensures consistent travel | Group-buy lead times at some vendors (up to 5 months) |
| Less lubricant needed than traditional designs | Requires left/right-specific housing orientation during assembly |
The TypePlus x YIKB stabilizers use a secured wire mechanism built from POK (polyketone) material that prevents the wire from popping out during keycap removal and maintains consistent wire travel over time. The design requires less lubrication than traditional stabilizers and maintains its performance longer.
Installation requires slightly more care because the housings are left/right specific. Pay attention during assembly and you will be rewarded with some of the smoothest stabilizer performance available. Note that availability varies: KBDfans sells these as a group buy with roughly 5-month lead time, while Divinikey and NovelKeys stock them as ready-to-ship retail.
Best for: Enthusiasts who appreciate thoughtful engineering and do not mind checking availability across multiple vendors.
#6 Best budget modded: Cherry clip-in + C3 Equalz wires
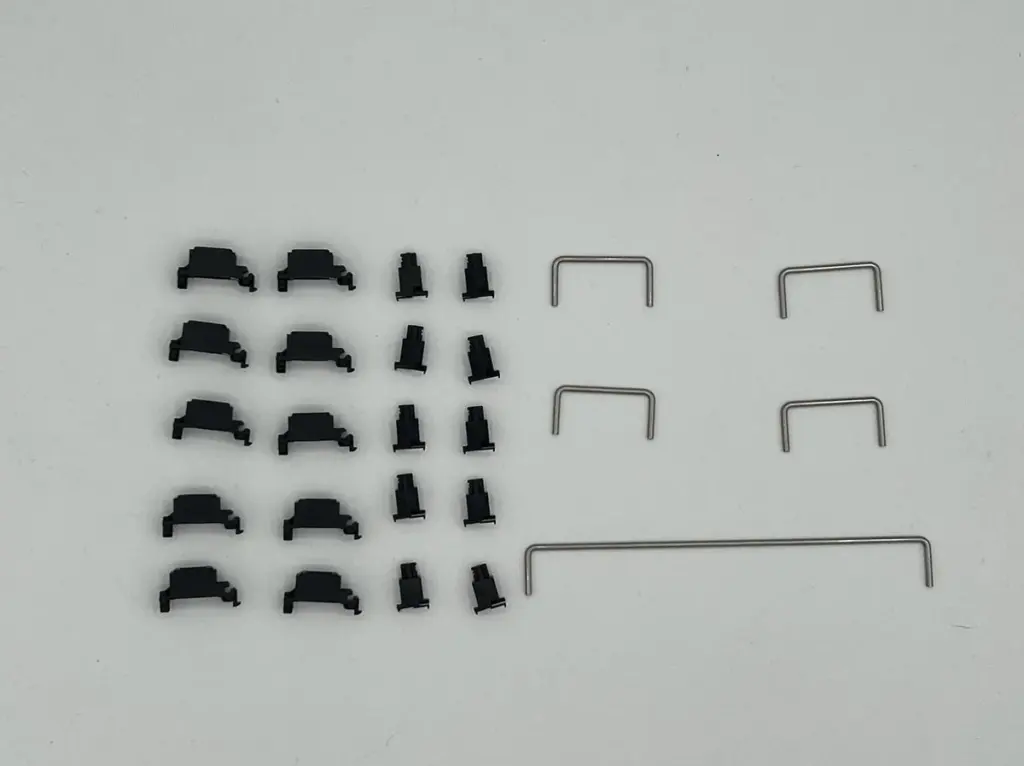
Verdict: The classic budget build recommendation. Genuine Cherry clip-in stabilizers paired with C3 Equalz aftermarket wires deliver performance that rivals screw-ins at a lower price.
7.8/10
Smoothness
Good
Noise
Very Good
Value
Excellent
Availability
Excellent
| Pros | Cons |
|---|---|
| Affordable at roughly $4-9 for stabs plus $5-8 for wires | Clip-in design is less secure than screw-in |
| C3 wires are consistently straight and well-made | Requires clipping the extra legs from the stems |
| Widespread availability | Stock Cherry wires often have inconsistent tolerances |
| Well-supported by community modding knowledge |
Cherry clip-in stabilizers are the stock stabilizers on many pre-built keyboards. On their own, they are fine but not exceptional. The magic happens when you replace the stock wires with C3 Equalz wires, which are consistently straighter and have tighter tolerances.
The combined price varies by vendor. Swagkeys sells genuine Cherry snap-in stabilizers for roughly $4 and C3 Equalz wire sets for roughly $5, for a total around $9. Other vendors sell combined Cherry+C3 kits directly. Clip the extra legs from the Cherry stems, apply Krytox 205g0 to the wire contact points, and check wire straightness before installation. The result is a stabilizer that performs close to a screw-in set.
Best for: Budget builders who already have a PCB that supports clip-in stabilizers and are comfortable with basic modding.
#7 Best plate-mount: Gateron Plate V2
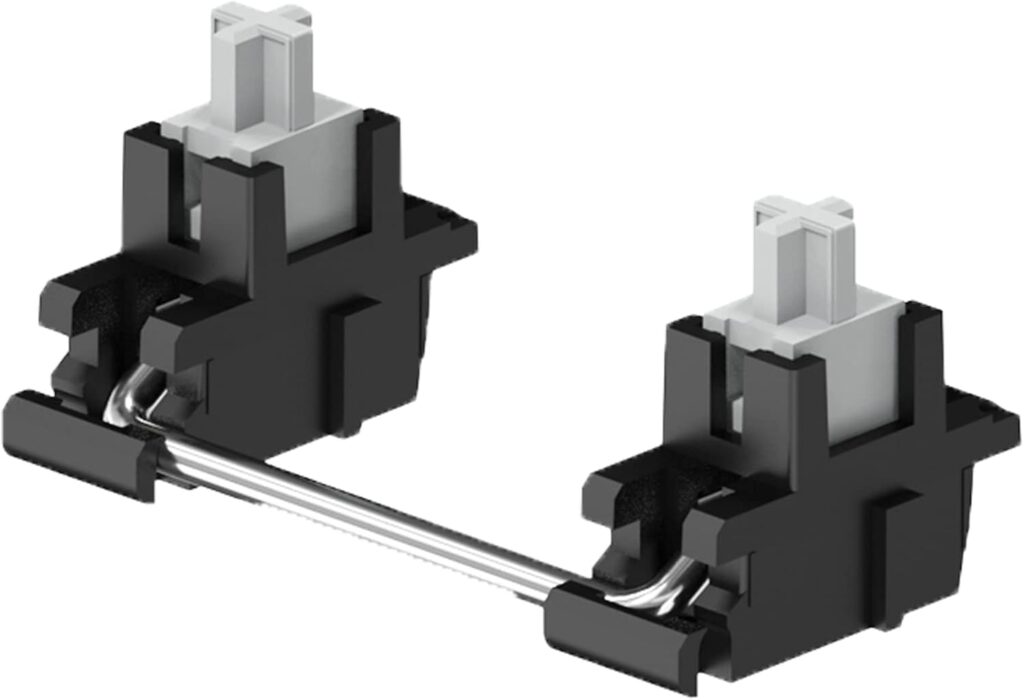
Verdict: The best option for keyboards that do not support PCB-mounted stabilizers. Gateron Plate V2 stabilizers are affordable and work adequately for entry-level builds.
7.2/10
Smoothness
Fair
Noise
Fair
Value
Excellent
Availability
Excellent
| Pros | Cons |
|---|---|
| Affordable at roughly $8-13 per set | Plate-mount design is less stable than screw-in |
| Works with any plate that has stabilizer slots | Harder to tune perfectly due to plate cutout variability |
| Widely available | Can shift when removing keycaps |
Gateron Plate V2 stabilizers are what you use when your PCB does not support screw-in or clip-in stabilizers. They clip into the plate directly and are common on entry-level keyboards and budget kits.
They are not as smooth or quiet as any screw-in option on this list. The plate-mount design means the stabilizers can shift slightly when keycaps are removed, and the plate cutout tolerances vary between manufacturers. With careful lubrication and the band-aid mod (placing small strips of fabric bandage material where the stabilizer contacts the plate), they can be made acceptable.
Best for: Entry-level builds where the PCB does not support screw-in or clip-in stabilizers and budget is the primary concern.
Necessary tools and materials
Before you start installing stabilizers, gather these tools and materials. Having everything ready before you begin saves time and prevents mistakes.
| Tool / Material | Purpose | Where to get it |
|---|---|---|
| Krytox 205g0 | Thick grease for lubricating stabilizer wire contact points and stem sliders | Any keyboard retailer |
| Small brush | For applying lubricant precisely to wire contact points | Included with most lube kits |
| Wire cutters or flush cutters | For clipping the extra legs from Cherry clip-in stabilizer stems | Hardware store or keyboard retailer |
| Flat surface (glass or mirror) | For checking wire straightness | Any flat, rigid surface |
| Pliers or wire bending tool | For adjusting bent stabilizer wires | Keyboard retailer or hardware store |
| Screwdriver (Phillips #0 or #1) | For installing screw-in stabilizers | Any hardware store |
| Band-aids or medical tape | For the band-aid mod (optional, reduces housing-to-PCB noise) | Pharmacy |
| Stabilizer shims | For thin 1.2mm PCBs (optional, prevents loose fit) | Keyboard retailer |
Most of these items are inexpensive and reusable across multiple builds. If you are installing screw-in stabilizers for the first time, the most important items are Krytox 205g0, a small brush, and the correct screwdriver.
How to install stabilizers
Installation steps vary by stabilizer type. Follow the section that matches your stabilizers.
Screw-in stabilizers
- Check wire straightness. Place each wire on a flat glass or mirror surface. Both ends should lie flat. If one end lifts, mark the high side and bend it gently downward with pliers.
- Lubricate the wire contact points. Dip a small brush in Krytox 205g0 and apply a thin coating to the ends of the wire where it sits inside the stabilizer housing. Also apply a thin layer to the inside of the wire cradle in the housing. Do not overlube. Excess grease attracts dust and can cause the stabilizer to feel sluggish.
- Lubricate the stem sliders. Apply a thin coat of Krytox 205g0 to the sides of the stabilizer stems where they slide against the housing. Focus on the contact surfaces. A little goes a long way.
- Insert the wire into the housing. Place the wire into the wire cradle of the housing. Snap the stem onto the wire from above. Make sure the stem moves freely up and down. If it sticks, the wire may be bent, or the lubricant is too thick.
- Install the stabilizer onto the PCB. Place the stabilizer housing over the PCB mounting holes. Insert the screws from the bottom of the PCB and tighten them gently. Do not overtighten. The stabilizer should sit flush against the PCB without gaps.
- Test the movement. Press the stabilizer stem down and release it. It should return to the top position smoothly without sticking. Repeat for all stabilizers before installing switches and keycaps.
Clip-in stabilizers
- Clip the extra legs. If using Cherry clip-in stabilizers, use wire cutters to clip the two small plastic legs on each side of the stem housing. These legs are designed for older PCB specifications and can cause the stabilizer to sit unevenly on modern PCBs.
- Follow the same lubrication steps as screw-in stabilizers. Check wire straightness, apply Krytox 205g0 to wire contact points and stem sliders.
- Snap the stabilizer into the PCB. Align the stabilizer housing with the oval cutouts in the PCB. Press down firmly until you hear a click. The stabilizer should sit flush against the PCB. If it does not click into place, check that the legs have been fully clipped.
- Avoid removing keycaps forcefully. Clip-in stabilizers can pop out of the PCB if keycaps are pulled with too much force. Use a wire keycap puller and pull straight up gently.
Plate-mount stabilizers
- Check the plate cutouts. Place the stabilizer into the plate cutout before mounting the plate to the PCB. If the fit is loose, consider the band-aid mod: place a small strip of bandage material on the plate where the stabilizer sits to take up the gap.
- Lubricate sparingly. Apply Krytox 205g0 to the wire contact points and the stem sliders. Use less lubricant than you would for screw-in stabilizers, since plate-mount stabilizers have tighter clearances.
- Install the plate. Once the stabilizers are clipped into the plate, mount the plate onto the PCB carefully. The stabilizer wires must align with the switch positions on the PCB. Test each large key by pressing it before soldering or fully assembling.
After installation
Once all stabilizers are installed, place the keycaps for each stabilized key (spacebar, enter, shift, backspace) and press each one at different positions along the key. Listen for rattle, ticking, or unevenness. If you hear rattle, remove the keycap and check the wire seating and lubrication. If a key feels uneven, the wire may need additional balancing.
Proper stabilizer tuning takes practice. Do not expect perfection on the first attempt. Even experienced builders adjust and retune stabilizers across multiple builds.
1. Check your PCB
Look at the area around the spacebar, enter, and shift key positions. If there are threaded screw holes, buy screw-in stabilizers. If there are oval cutouts without threads, buy clip-in. If there are no holes at all, you need plate-mount.
2. Check your PCB thickness
Standard 1.6mm PCBs work with most stabilizers out of the box. Thinner 1.2mm PCBs may need stabilizer shims to prevent a loose feel.
3. Check your spacebar size
Most keyboards use a 6.25u spacebar. Some compact 60% keyboards and some TKL boards use a 7u spacebar with a different stabilizer wire. Most stabilizer sets include both sizes, but verify before buying if your board uses a non-standard layout.
4. Decide on your budget
If you can spend $15-22, the Swagkeys Knight V4 or TX AP Rev 4 are the best options. If your budget is under $15, Durock V2 is the safest choice. If your budget is under $10, Cherry clip-in with aftermarket wires is the best value.
Stabilizer by build type
| Build type | Recommended stabilizer | Why |
|---|---|---|
| Premium custom | Swagkeys Knight V4 | Best out-of-box performance, minimal tuning |
| Performance build | TX AP Rev 4 | Doubleshot POM/TPU stem, tight tolerances |
| Smooth feel build | Staebies V2 | POM stems, consistent build quality |
| First custom build | Durock V2 | Affordable, well-understood, easy to tune |
| Innovation-focused | TypePlus x YIKB | Secured wire mechanism, POK material |
| Budget build | Cherry clip-in + C3 wires | Value option when properly modded |
| Entry-level / plate-only | Gateron Plate V2 | Only option for plate-mount boards |
Frequently Asked Questions
Which keyboard stabilizers are the best?
The Swagkeys Knight V4 and TX AP Rev 4 are the best screw-in stabilizers currently available. Durock V2 is the best value option. Cherry clip-in with C3 Equalz wires is the best budget modded option.
What is the difference between screw-in and clip-in stabilizers?
Screw-in stabilizers mount to the PCB with screws for a more secure, rattle-free fit. Clip-in stabilizers snap into PCB holes without screws. Screw-in is universally preferred for custom builds.
Do I need screw-in or plate-mount stabilizers?
Check your PCB. If there are threaded screw holes near the key positions, use screw-in. If there are oval cutouts, use clip-in. If there are no holes at all, use plate-mount.
What size stabilizers do I need?
Most keyboards use 4x 2U stabilizers (for Enter, Shift, Backspace, etc.) plus 1x 6.25u or 7u stabilizer for the spacebar. Most sets include both 6.25u and 7u wires. Verify your spacebar size before buying.
Do I need to lubricate stabilizers?
Yes. Even the best stabilizers benefit from lubrication. Apply Krytox 205g0 (or a similar thick grease) to the wire contact points inside the housing and to the stem sliders. Do not overlube. A thin coating is enough.
Why are my stabilizers rattling?
The most common cause is an unbalanced wire. Place the wire on a flat surface and check if both ends lie flat. Bend the high side down gently with pliers. Lubrication and the band-aid mod can also help.
Can I put screw-in stabilizers in any keyboard?
Only if the PCB has threaded screw holes. Most custom keyboard PCBs support screw-in stabilizers. Many pre-built keyboards do not. Verify before buying.
What is the band-aid mod for stabilizers?
The band-aid mod involves placing small strips of medical tape or bandage material between the stabilizer housing and the PCB. It cushions the contact point and reduces noise from the stabilizer bottoming out against the PCB.
Final Verdict
The Swagkeys Knight V4 is the best keyboard stabilizer for most custom builds. It delivers excellent out-of-box tolerances, a polycarbonate housing with silicone-dampened contact points, and requires minimal tuning to reach a rattle-free state. The TX AP Rev 4 is a close second with its doubleshot POM/TPU stem design.
If you are building your first keyboard, start with Durock V2. They are affordable, widely available, and there is years of community knowledge about how to tune them. If you are on a tight budget, Cherry clip-in stabilizers with C3 Equalz wires offer surprisingly good performance for roughly $9-14 total.
The stabilizer is the most overlooked component in a keyboard build. A premium switch set in a poorly stabilized keyboard will still rattle. A good stabilizer set in an otherwise average build can feel exceptional. Choose wisely, lubricate carefully, and test before final assembly.